Adding a New Track in Guitar Pro 8
Guitar Pro allows you to add multiple tracks to your project, supporting a variety of instruments and configurations. To begin, select Track > Add from the menu.
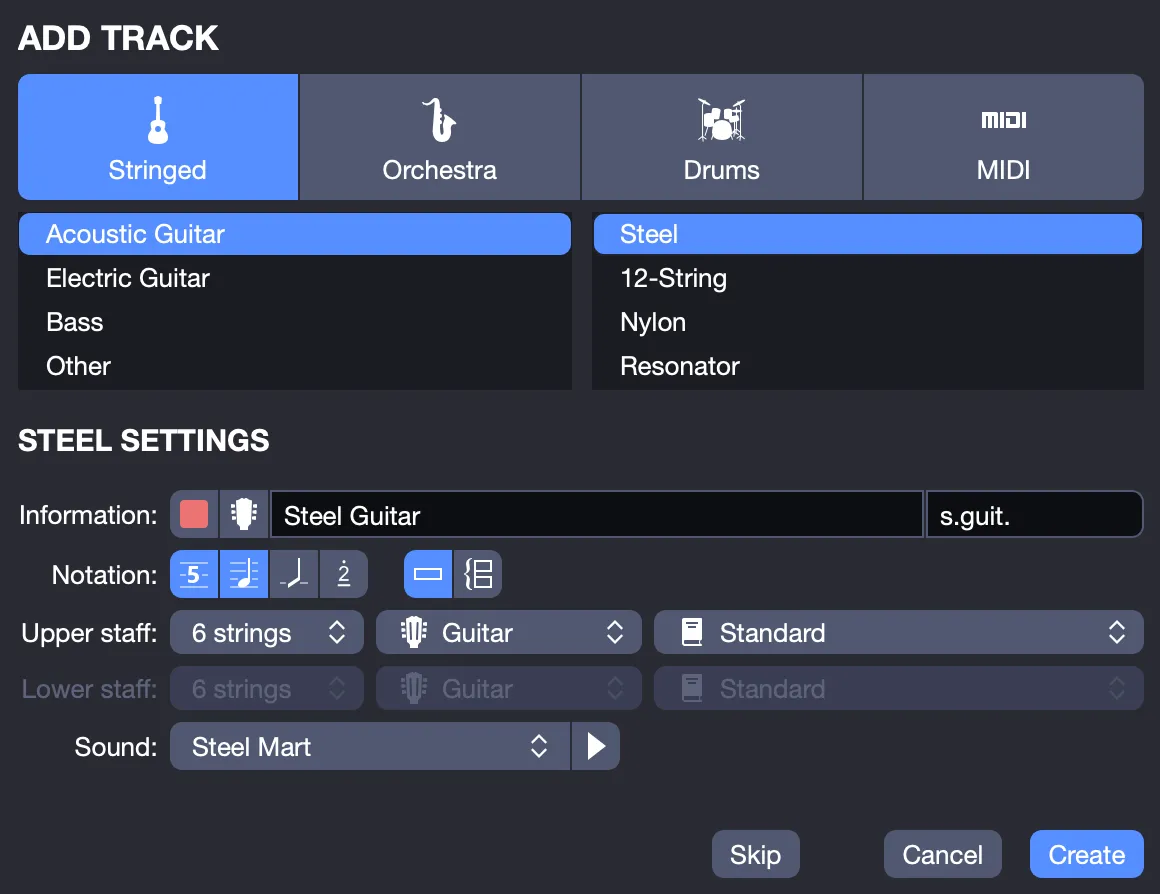
The Instrument Window opens, where you can configure the new track:
- Instrument Type: Select from Stringed (e.g., guitar, bass), Orchestra (e.g., violin, brass), Drums, or MIDI.
- Instrument: Choose an instrument from the lower panel, such as “Acoustic Guitar” or “Trumpet”.
- Information: Assign a name (e.g., “Lead Guitar”), choose a color for visibility, and select an icon.
- Notation Type: Choose Standard, Tablature, Slash, or Numbered (Jianpu). Combine options as needed.
- Staff Type: Select Simple (single staff) or Grand Staff (two staves, e.g., for piano).
- Tuning: Use the default tuning or customize it (e.g., Drop D). Preview with the play button.
- Sound: Select a tone (e.g., clean, distorted). Preview with the play button; adjust later if needed.
- Create: Click Create to add the track to your workspace.
Other methods
You can also add a track to your project by:
- Clicking the + button located in the Global View at the bottom of the Guitar Pro window
- Double-clicking on the instrument of your choice in the Add a track window.
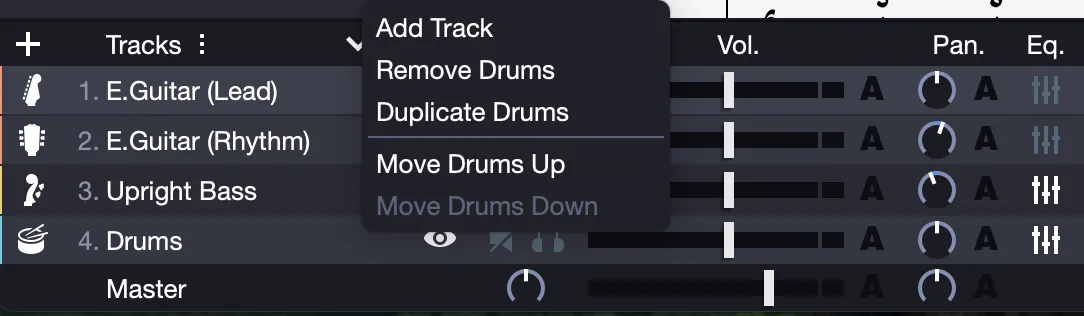
- Right-clicking on a track in the Global View and selecting Add a track.
Track Settings from the Track Inspector
Additional track configuration options are available in the Track Inspector. See the Track Inspector settings section for details.
Deleting a Track in Guitar Pro
To delete a track, use one of these methods:
- Go to Track > Delete in the menu.
- Right-click the track in the Global View (at the bottom of the Guitar Pro window), then select Remove ‘track’ from the contextual menu.