
Drum Mixing in Guitar Pro 8
The Drum Mixing in Guitar Pro allows you to customize the sound of your drum track, providing precise control over each element to refine the audio output of your compositions.
Access the Drum Mixing window, or “Drum Mix,” from the Bank Settings icon in the inspector of your track.
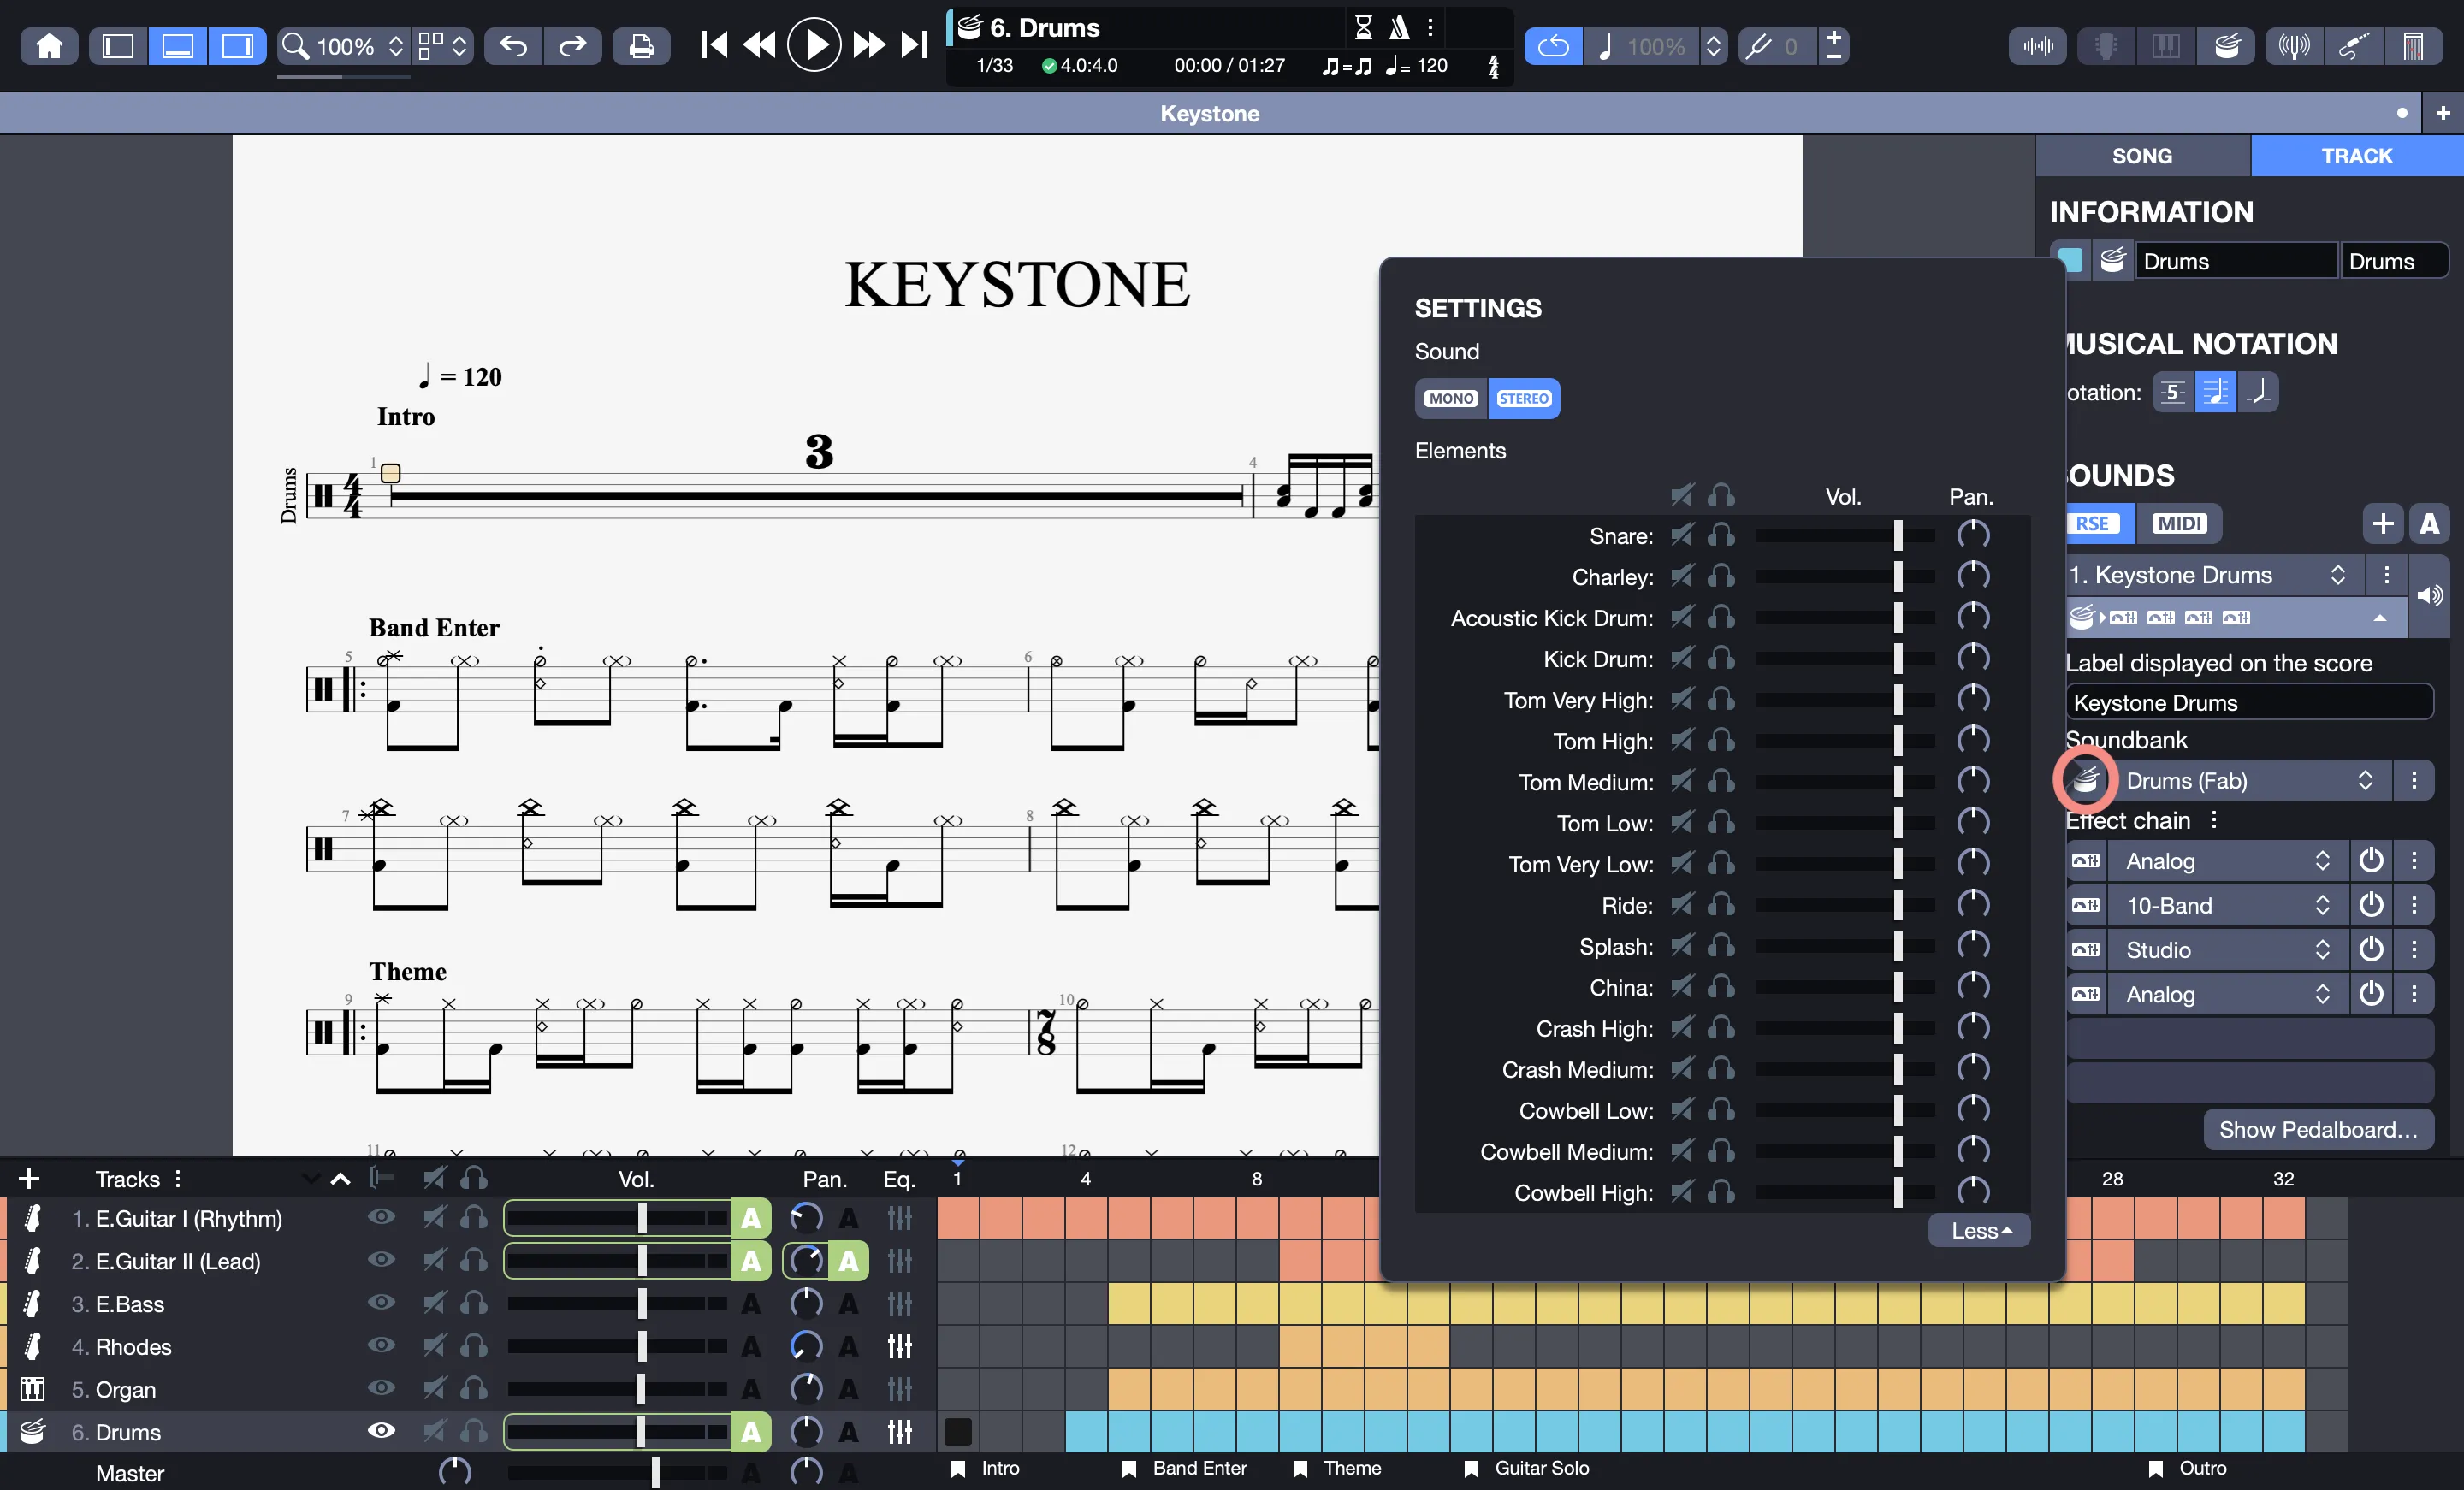
This interface offers various options to adjust the mix, tailored to the needs of drummers and composers looking to fine-tune their rhythmic track.
Features of the Drum Mixing
From the Drum Mixing window, you can personalize several key settings, each contributing to a balanced and professional mix:
Isolate or Mute
Isolate or mute certain elements of your drum track to focus on specific parts or eliminate unwanted sounds. For example, deactivate the snare to listen only to the toms, or isolate the hi-hat to adjust its role in the groove.
Adjust Volume and Panning
Adjust the volume and panning of each element to shape the dynamics and spatialization of your drum kit. For example, increase the bass drum volume for more presence, or shift the cymbals to the right for a more immersive stereo effect.
Mono or Stereo Mode
Choose between Mono or Stereo mode for your track. The stereo mode expands the sound space, ideal for a rich production, while the mono mode tightens the mix, useful for more compact renditions or certain setups.
Important note
These adjustments are only available with a track using the RSE (Realistic Sound Engine) and not with a MIDI track. The RSE, thanks to its realistic samples, allows for detailed adjustments, unlike MIDI, which uses basic synthetic sounds.
The mixing window transforms your track into a fully customizable element, offering all the tools you need for a balanced sound result tailored to your compositions.