
Track Sound in Guitar Pro 8
Guitar Pro 8 enables you to customize the sound of each track to achieve the desired audio output. This guide explains how to select and adjust sounds, combining sound banks, effects, and automations, from track creation to using the effects pedalboard.
Understanding Sounds in Guitar Pro
A sound combines a sound bank (the raw, unprocessed sound of an instrument, such as a guitar without effects) and an effects chain (pedals, amplifiers, or other effects). You can choose between the RSE (Realistic Sound Engine) for a lifelike sound or MIDI for a simpler, lightweight option, based on your preferences.
Creating a Track with a Sound
When creating a track, the Add Track window opens, allowing you to select an instrument with a default preset sound.
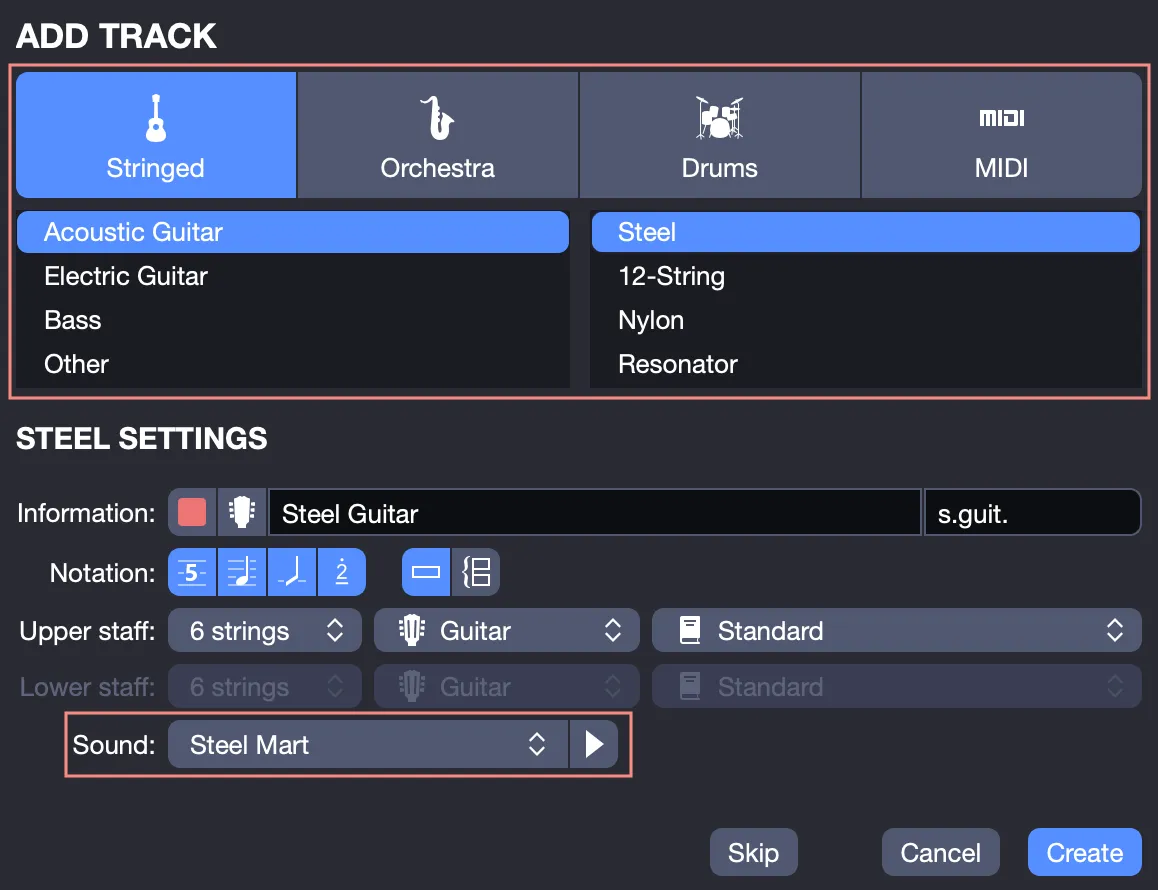
You can choose a different sound directly in this window, browsing available presets for instruments like acoustic or electric guitars.
Adjusting Sounds in the Track Inspector
After creating a track, you manage its sound in the Track Inspector, located on the right side of the screen.
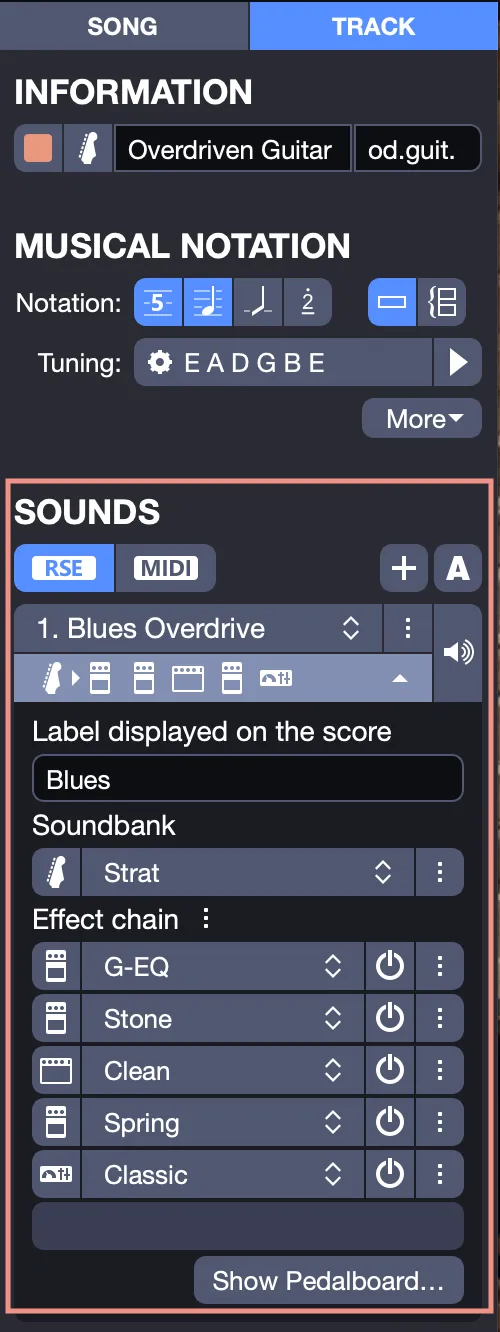
The inspector provides precise control over the audio engine, sound banks, and effects.
Selecting the Audio Engine
In the inspector’s header, choose between the RSE engine for realistic audio or the MIDI engine for lighter playback.
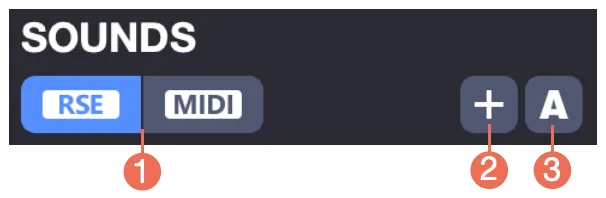
- Switch between RSE and MIDI.
- Add or duplicate a sound.
- Access sound automations.
You can mix engines, for example, using RSE for a guitar track and MIDI for drums.
Adding Multiple Sounds
A track can include multiple sounds to enable changes (automations) at different points. Click the + icon to add a sound from the library.
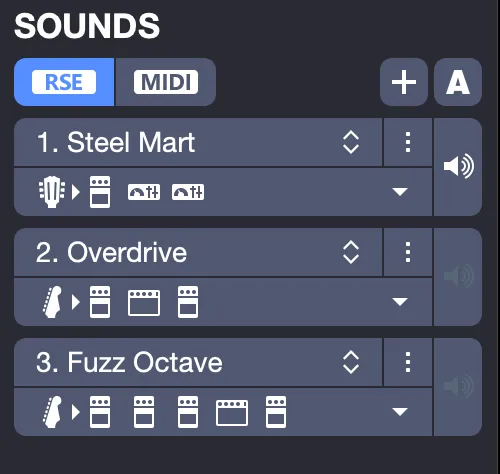
Added sounds appear in a list within the inspector.
Configuring Sound Automations
To schedule a sound change, such as switching from a clean to a distorted guitar sound, use the Sound Automations window, accessible via Edit > Sound > Sound Automations or the A icon in the inspector (see details on automations).
Exploring Sound Options
The Sound block in the inspector groups detailed settings.
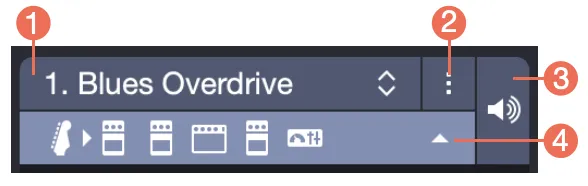
- Sound library: Click the sound name to browse categories like acoustic guitars, electric guitars, basses, keyboards, or others, with subcategories for precise selection.
- Options: Click the three dots to rename, move, delete, copy, paste, or save the sound as a template.
- Lock sound: Click the speaker to force a sound, overriding other sounds or automations.
- Show details: Expand or collapse advanced settings.
Expanding the details reveals:
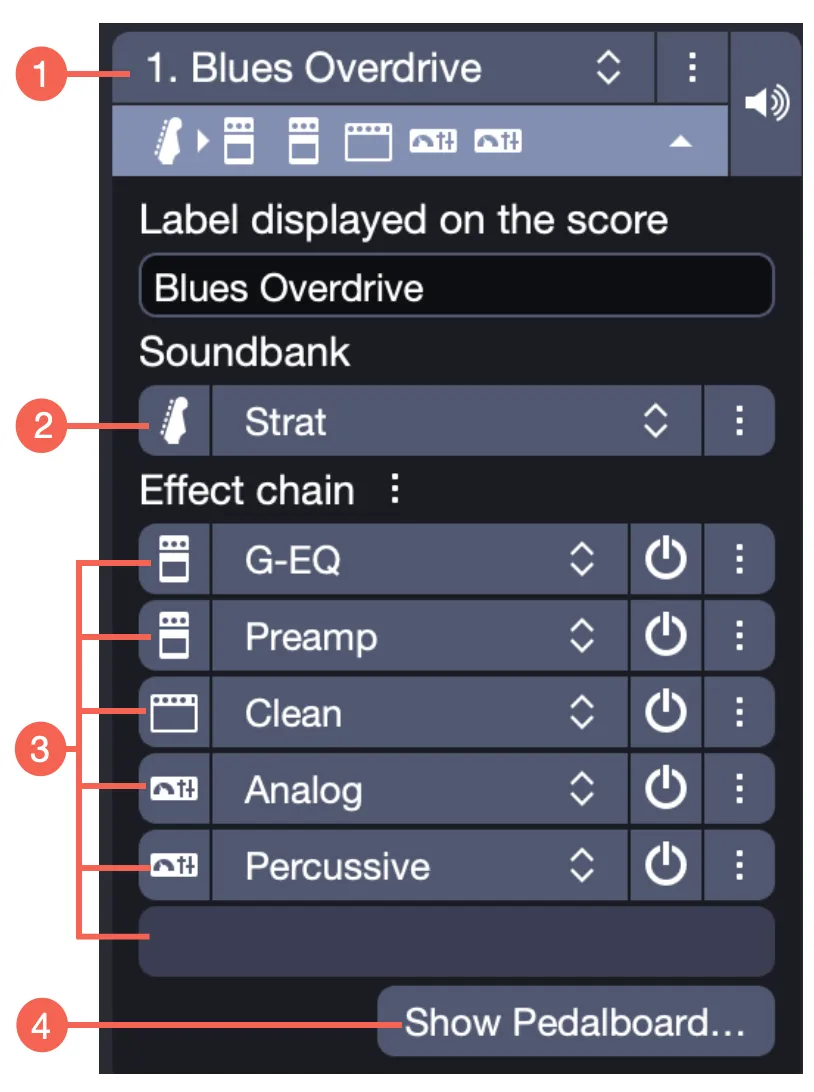
- Label: Name displayed in the score for sound changes.
- Sound bank: Access and adjust sound banks.
- Effects chain: Manage applied effects.
- Show pedalboard: Open the effects pedalboard.
Changing a Track’s Sound
To modify a sound, click its name in the inspector to explore the sound library.
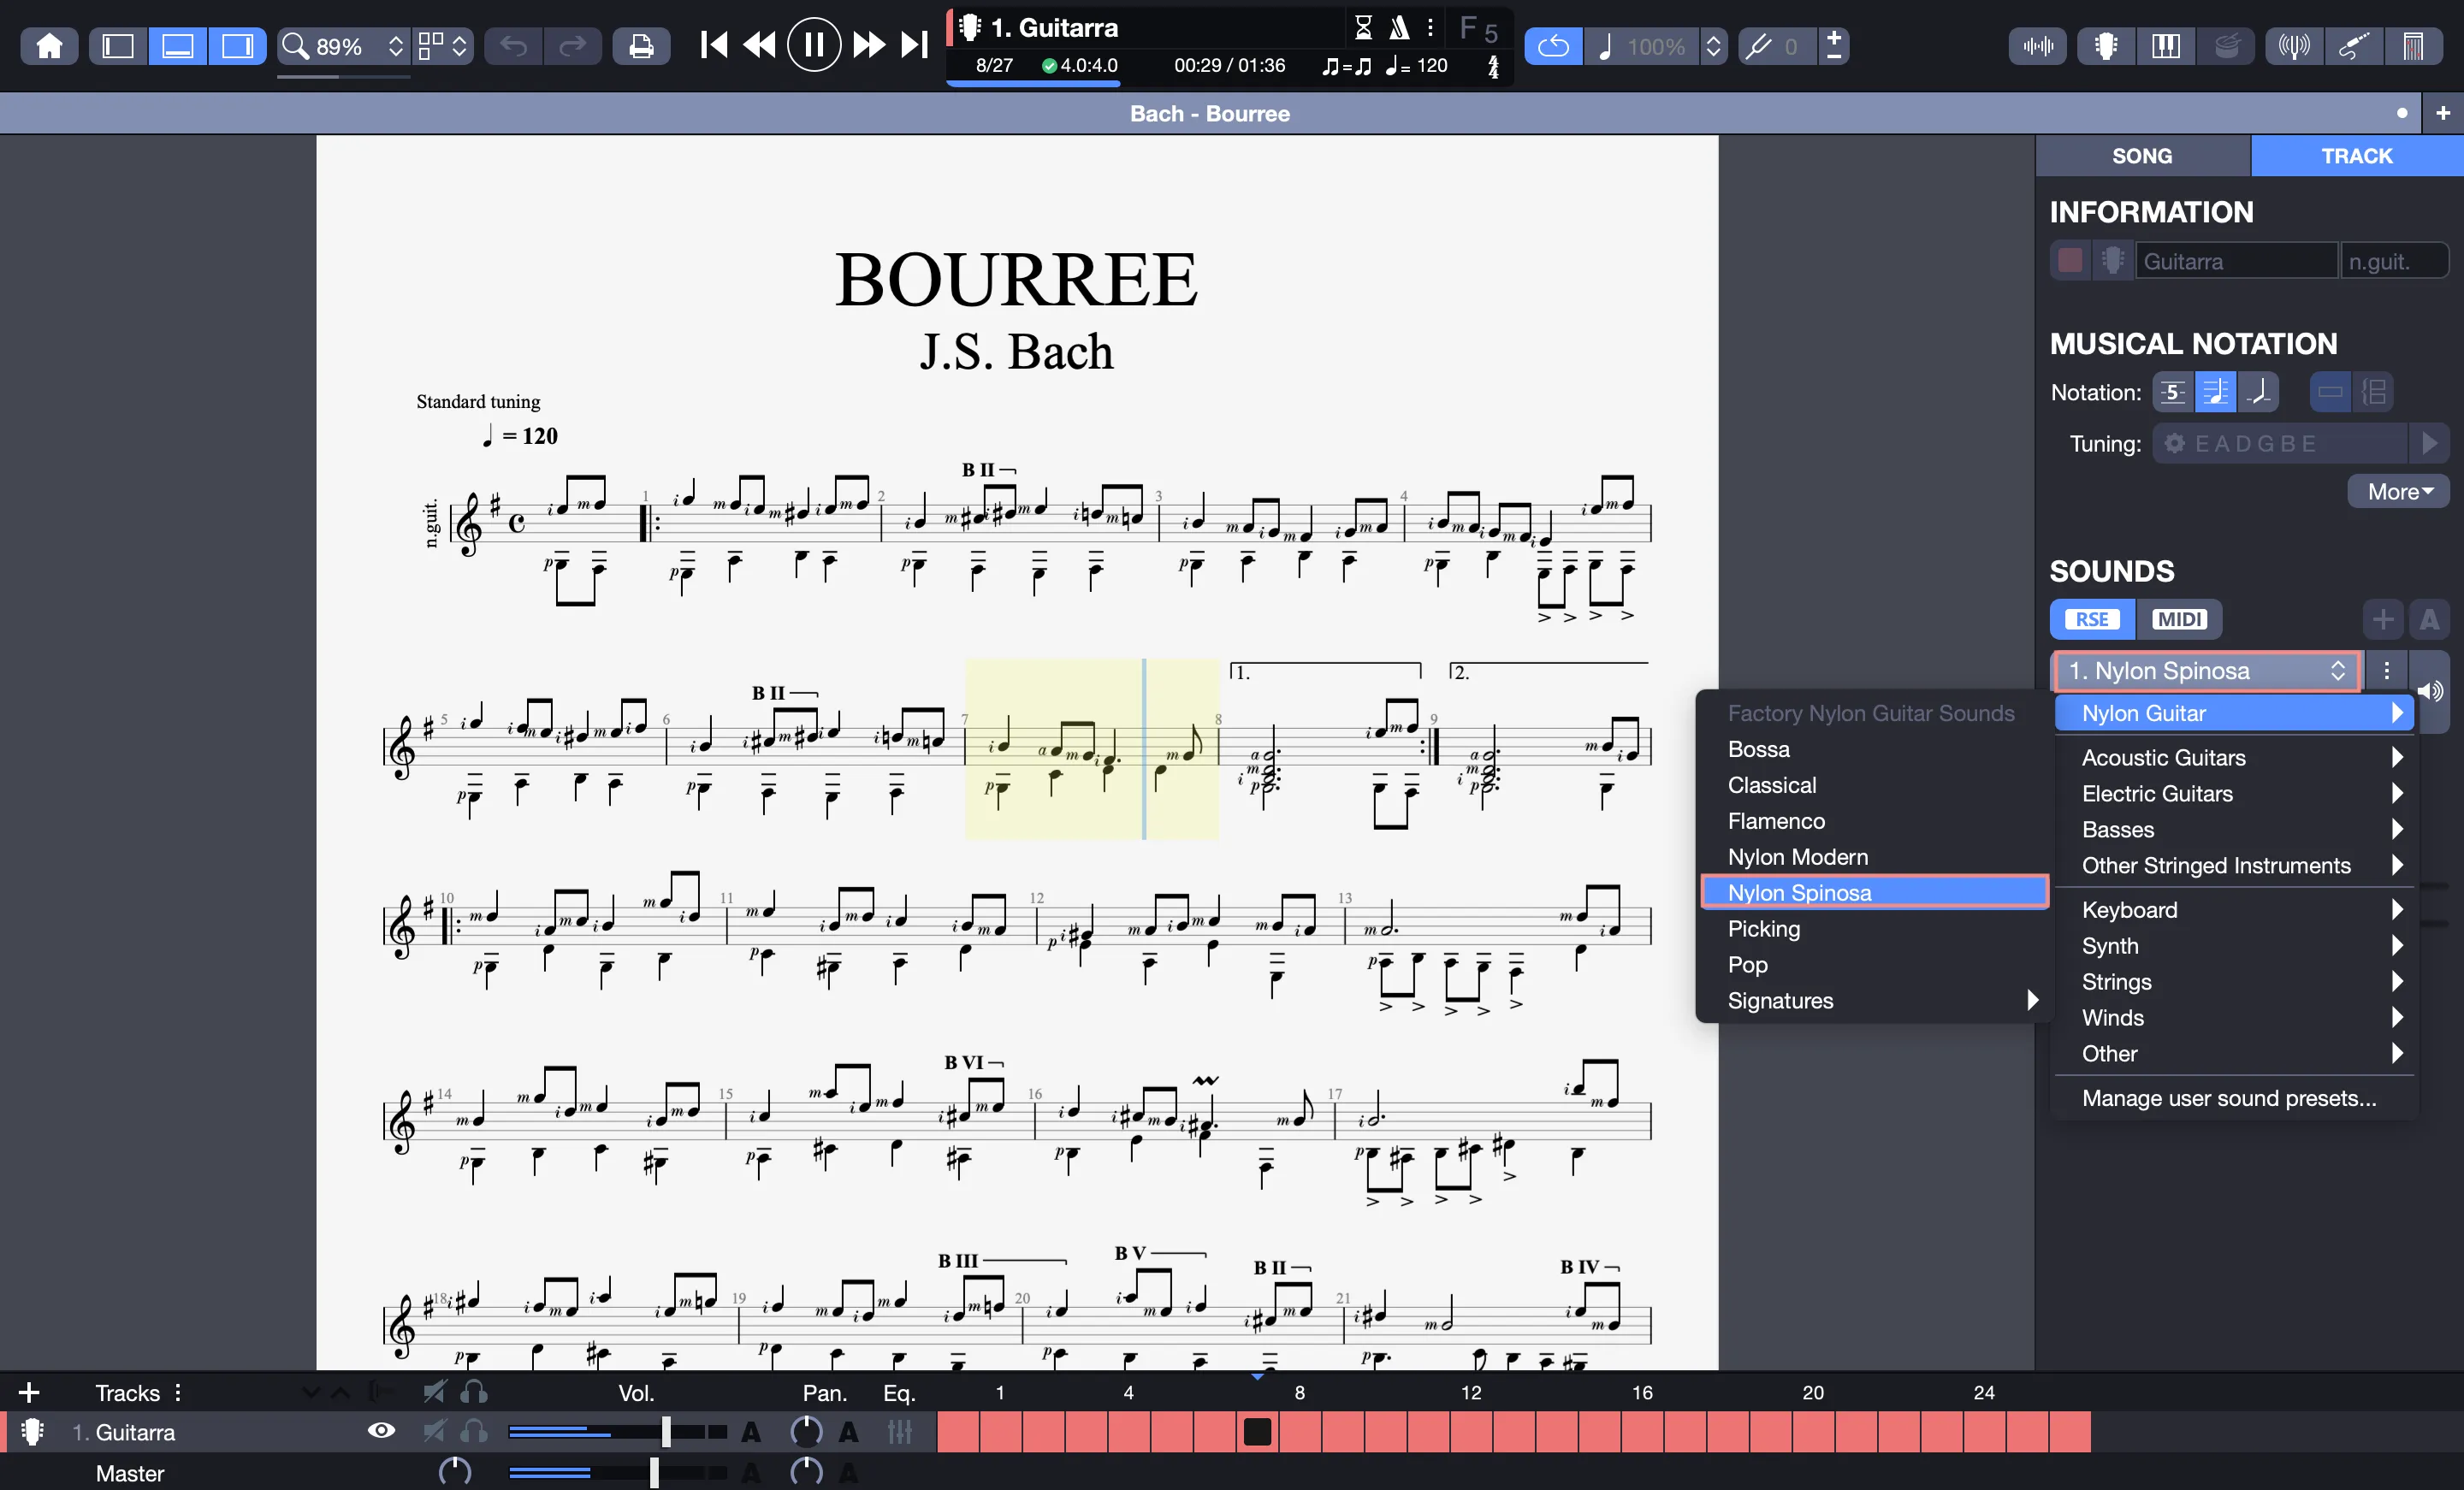
Standard sounds are organized by categories, while the Signatures submenu offers presets inspired by iconic music standards. During playback, hover over a sound to preview its rendering in real-time. Select a sound to apply it.
Updating the Label
The label appears in the score for sound changes. By default, it matches the sound name, but you can customize it, for example, to “w/disto” for a distorted sound.
Configuring the Sound Bank
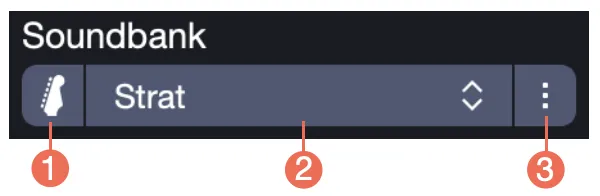
Click the sound bank name to select a raw, effect-free instrument sound.
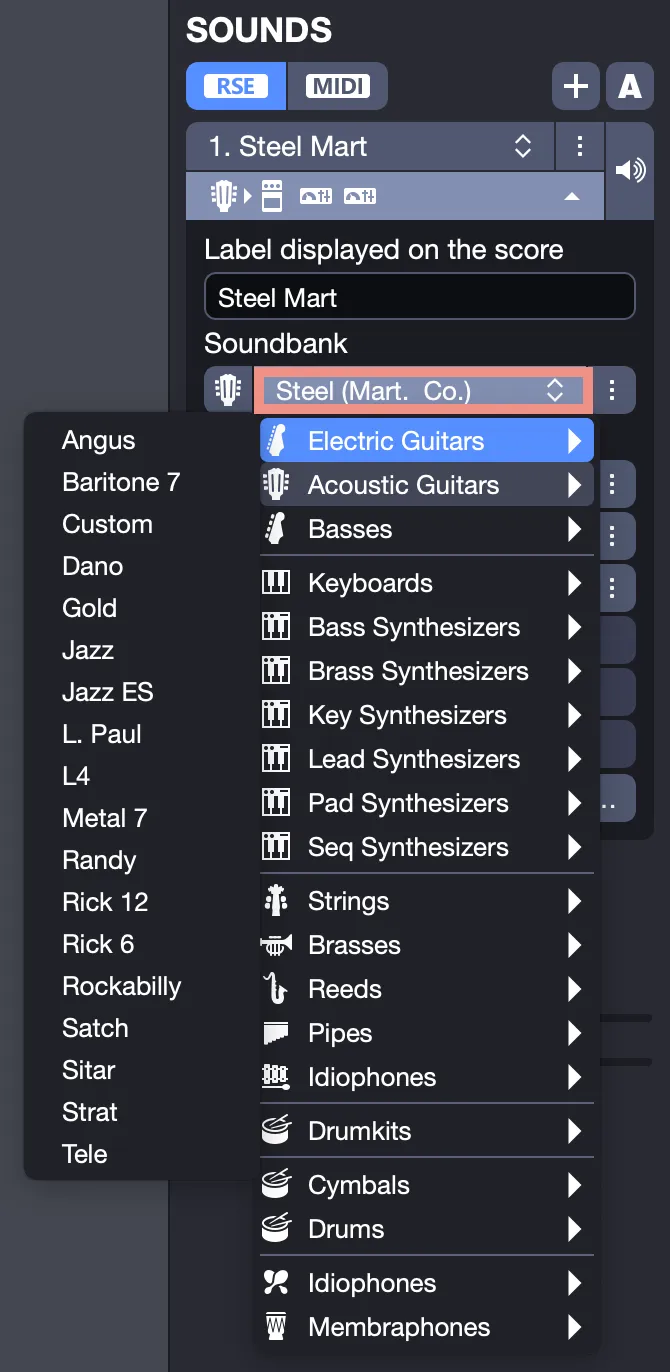
- Settings: Click the bank icon to adjust mono/stereo or microphone positions.
- Library: Browse available banks.
- Options: Copy or paste a bank.
Configuring the Effects Chain
A track can include up to 6 effects (pedals, amplifiers). Click a slot to add or edit an effect.
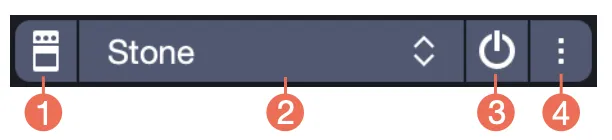
- Effect settings (see below).
- Effects library.
- Enable/disable effect (on/off).
- Options (copy, paste, move, delete).
Click an effect’s icon to fine-tune its settings.
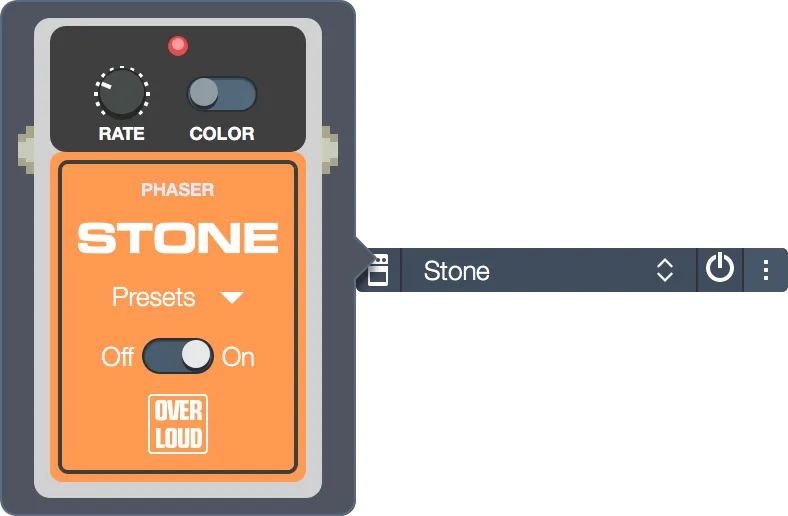
The Presets button on the pedal provides preconfigured effect settings.
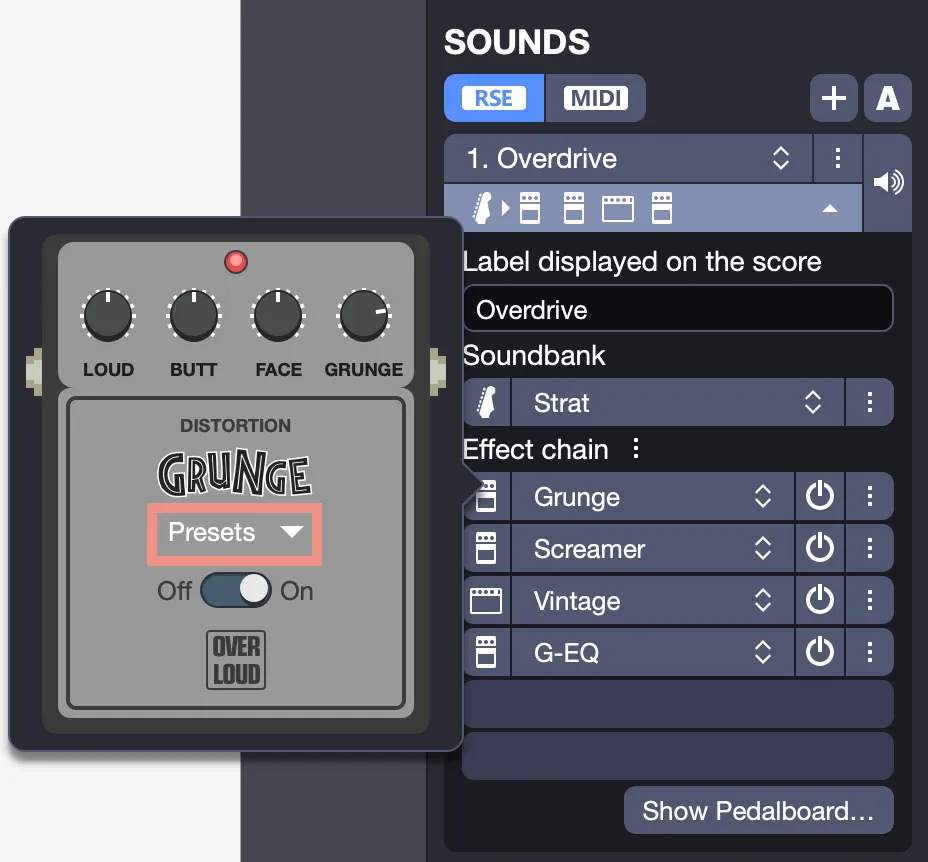
Toggle an effect with the on/off button.
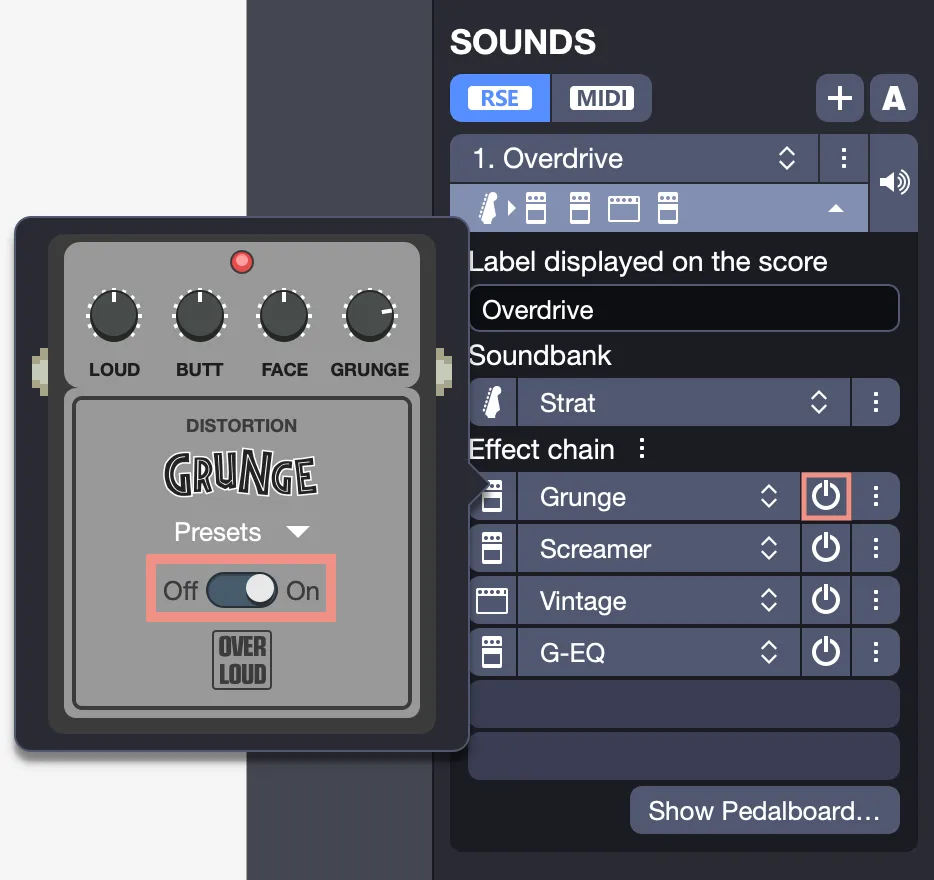
Move an effect via the Move up/down option in the Options menu.
Using the Effects Pedalboard
The Effects Pedalboard offers a visual interface for configuring effects, accessible via Show Pedalboard in the inspector.
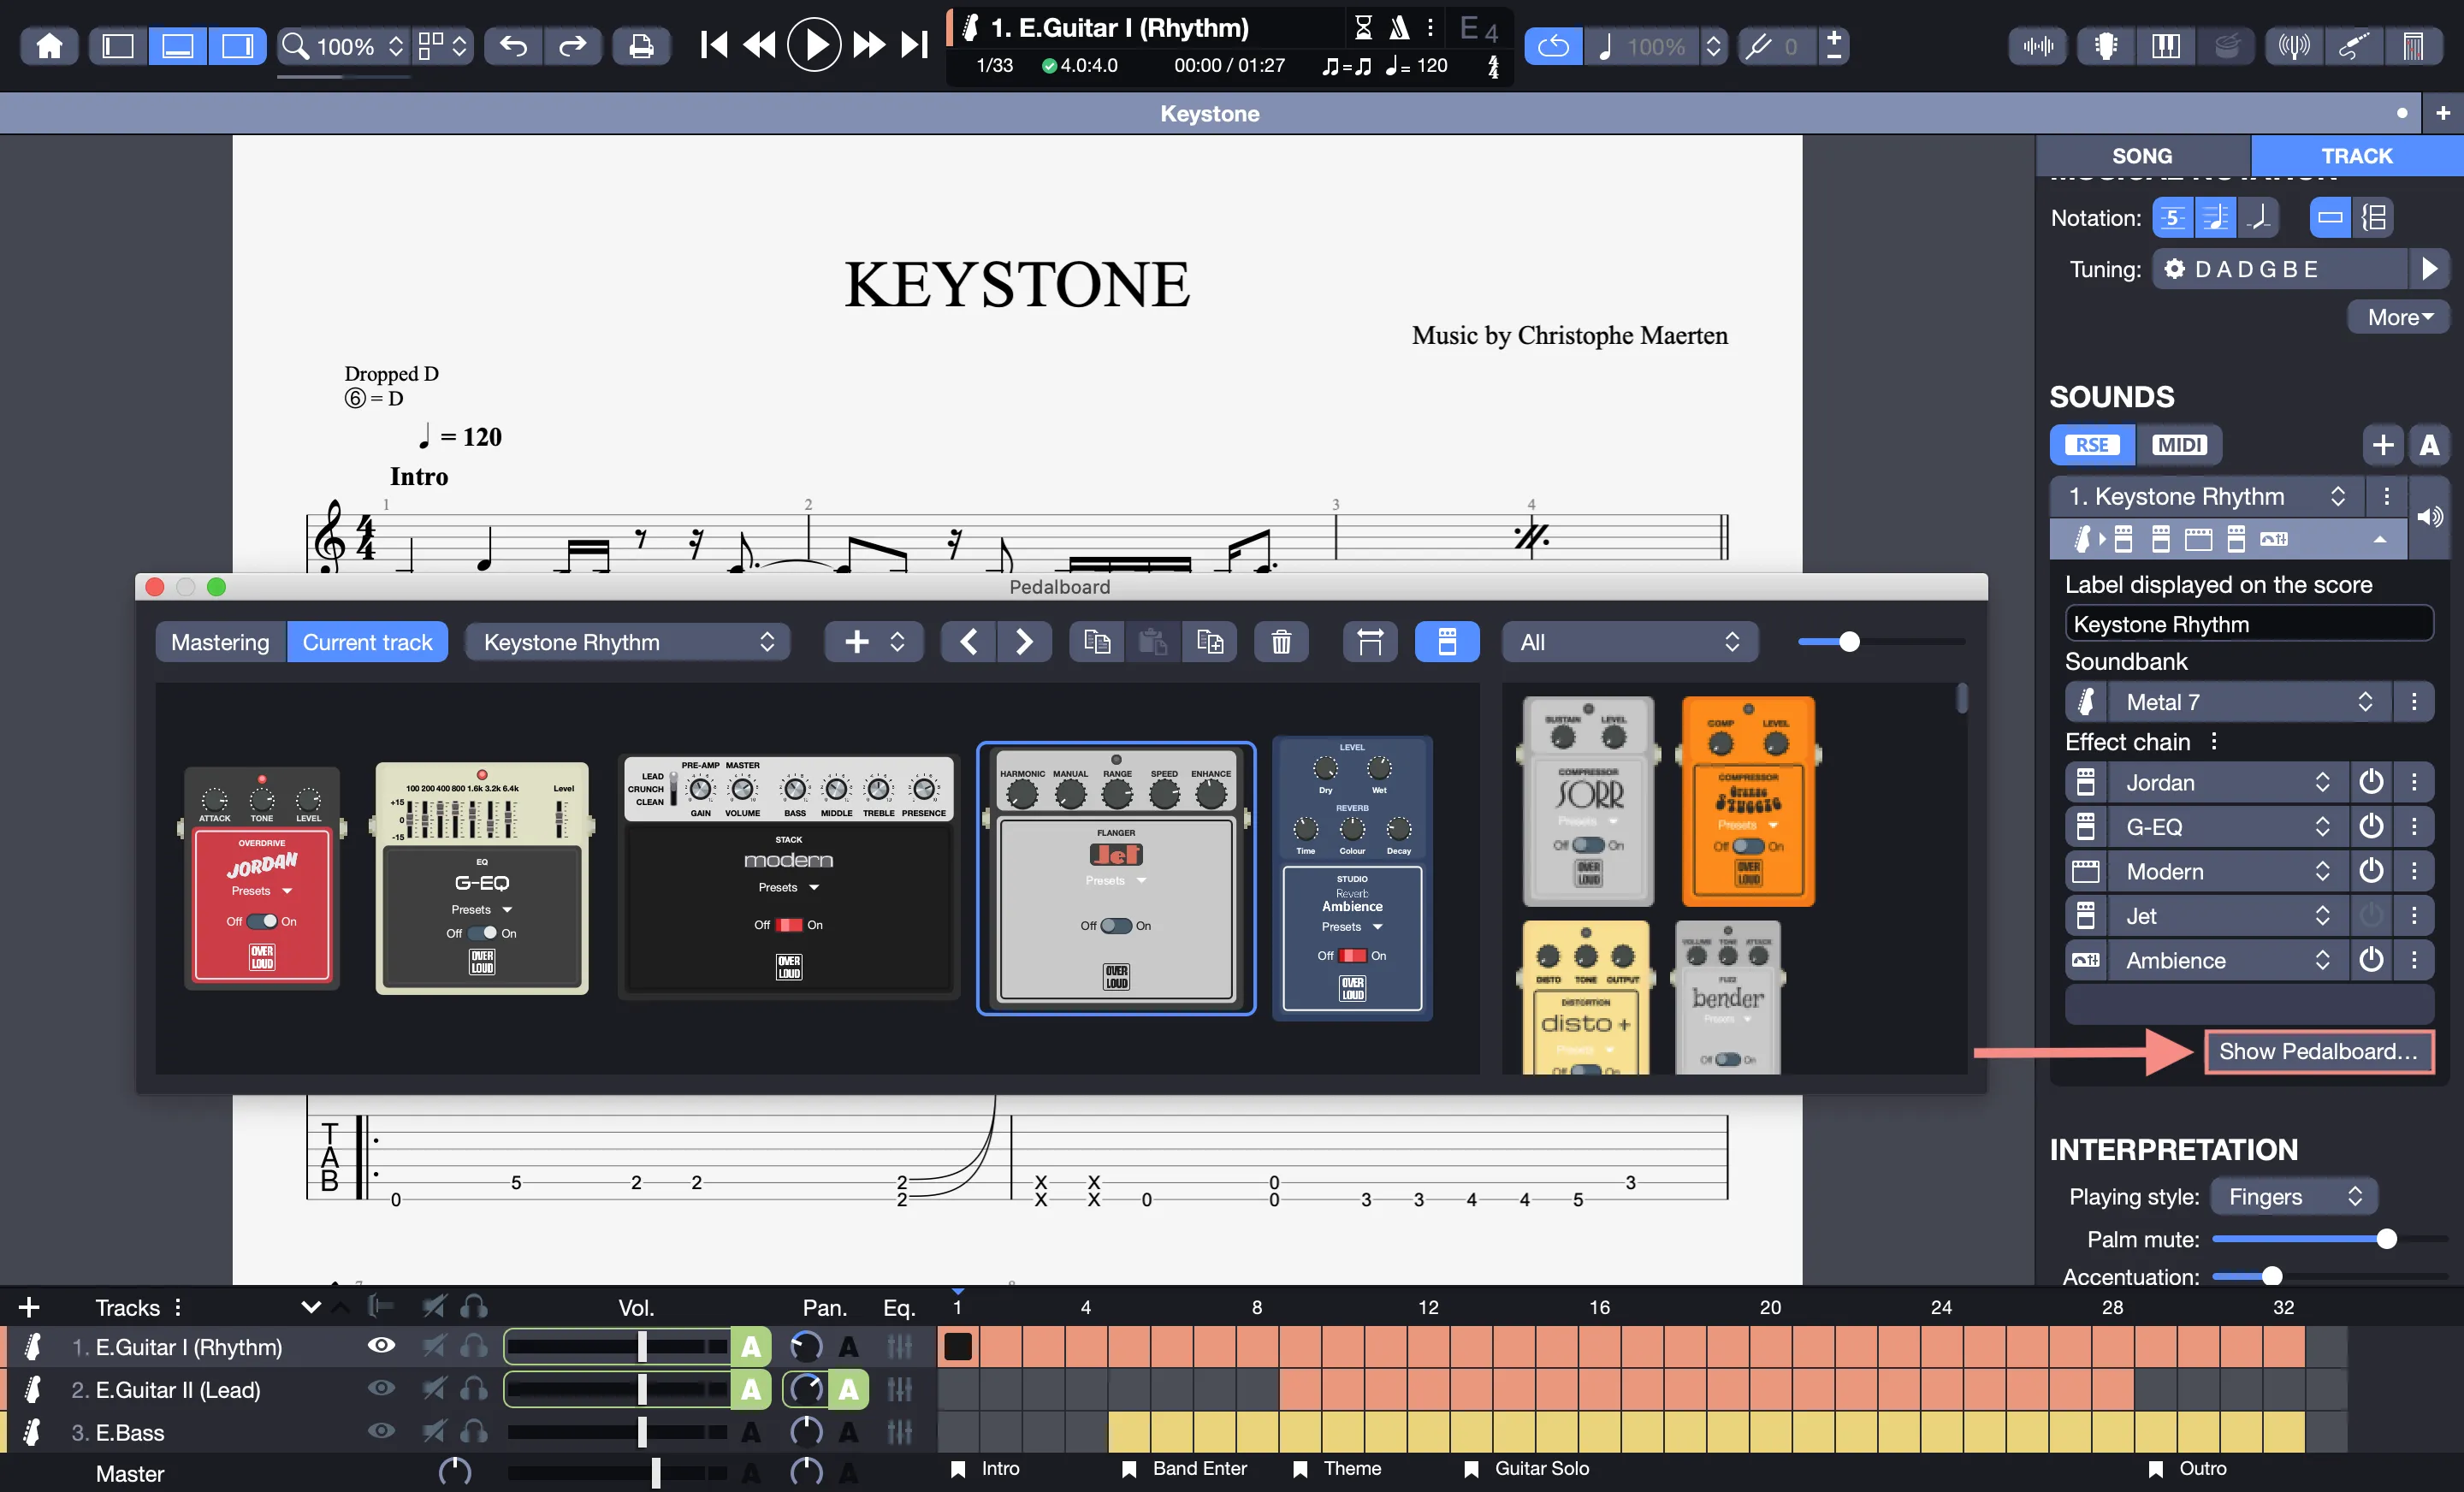
It supports the current track (up to 6 effects) or global mastering (up to 3 effects). Each sound has its own pedalboard.
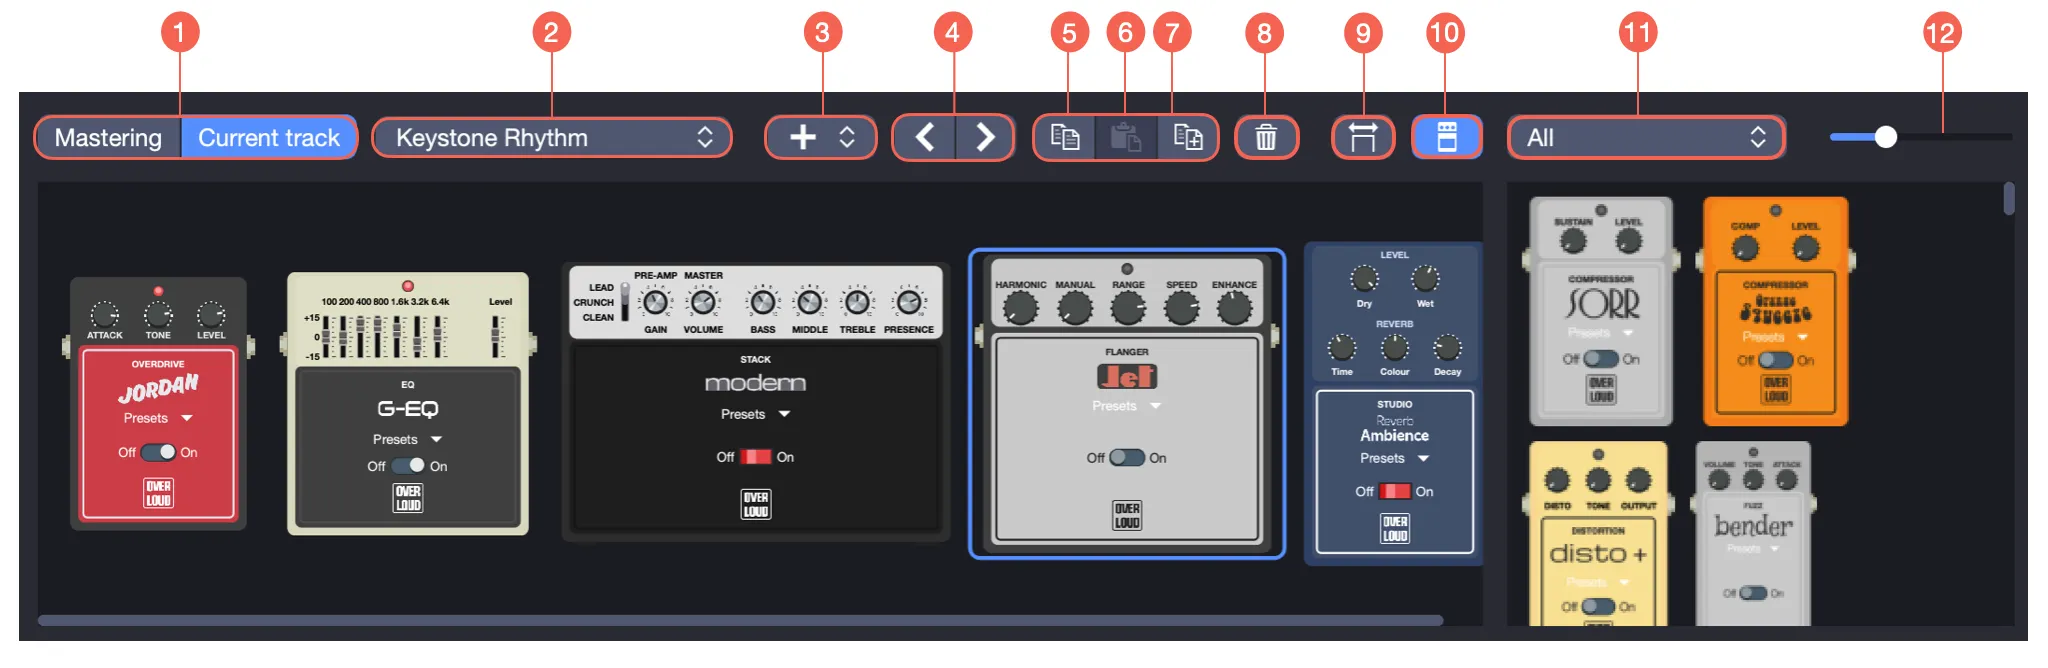
- Display pedalboard for mastering or current track.
- Change sound (if multiple sounds added).
- Add a pedal.
- Move the selected pedal left/right.
- Copy the selected pedal.
- Paste a pedal.
- Duplicate the selected pedal.
- Delete the selected pedal.
- Adjust width.
- Show/hide pedal browser.
- Change effect category.
- Zoom in/out (pedal browser).
Managing Pedals in the Pedalboard
Add or remove pedals via:
- The effects chain in the inspector.
- The toolbar options in the pedalboard window.
- Dragging and dropping from the pedal browser.
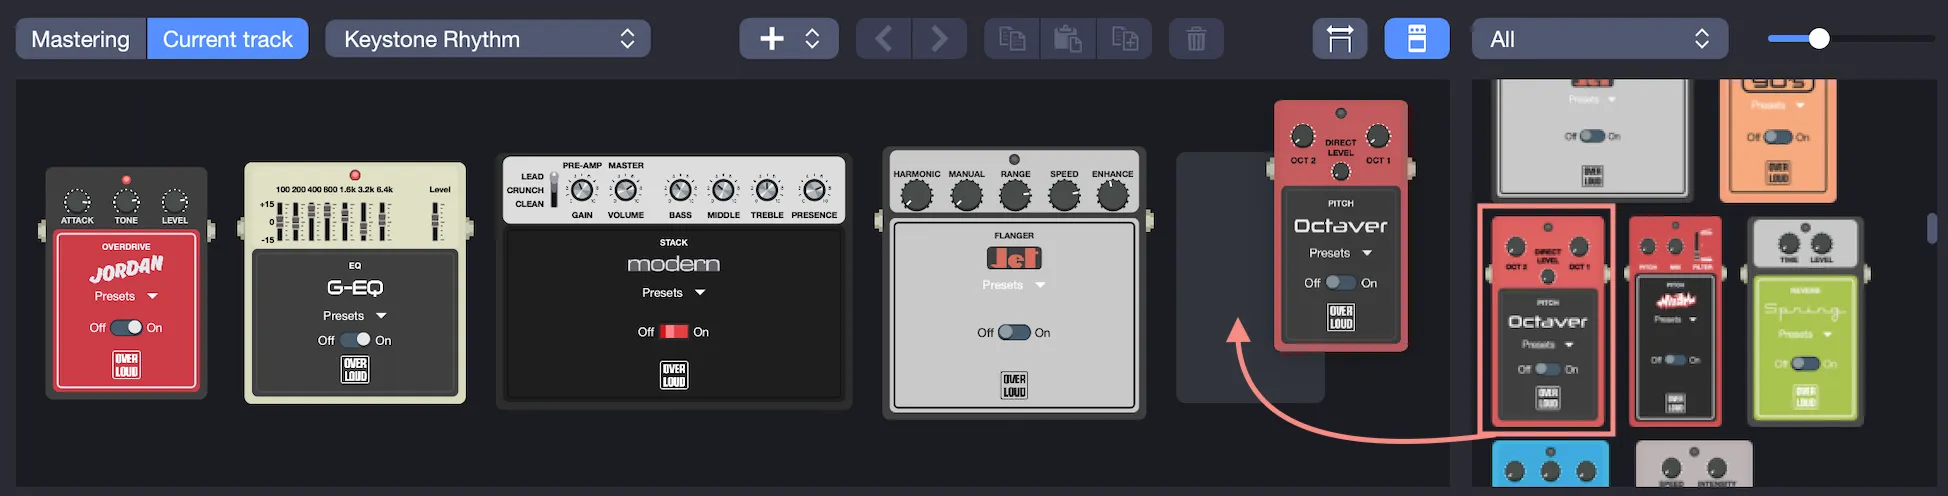
To remove a pedal, drag it outside the window or use the Delete key. Right-click a pedal to access available effects. Reorder pedals by dragging them. Adjust settings (knobs, on/off buttons) as with a physical pedal.
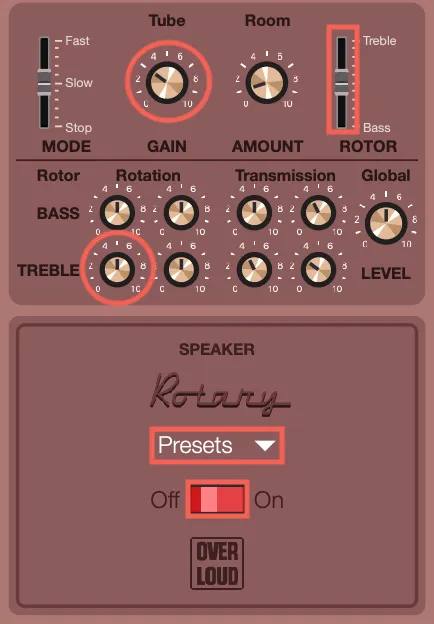
Access presets via the Presets option for each effect. Changes apply in real-time during playback.
The pedalboard is exclusive to RSE tracks and unavailable for MIDI tracks. Convert tracks via the Sound menu if needed.