
Using the Audio Track Feature in Guitar Pro 8
The Audio Track feature in Guitar Pro 8 allows you to import an audio file and integrate it seamlessly into your project, enhancing your scores with real audio elements.
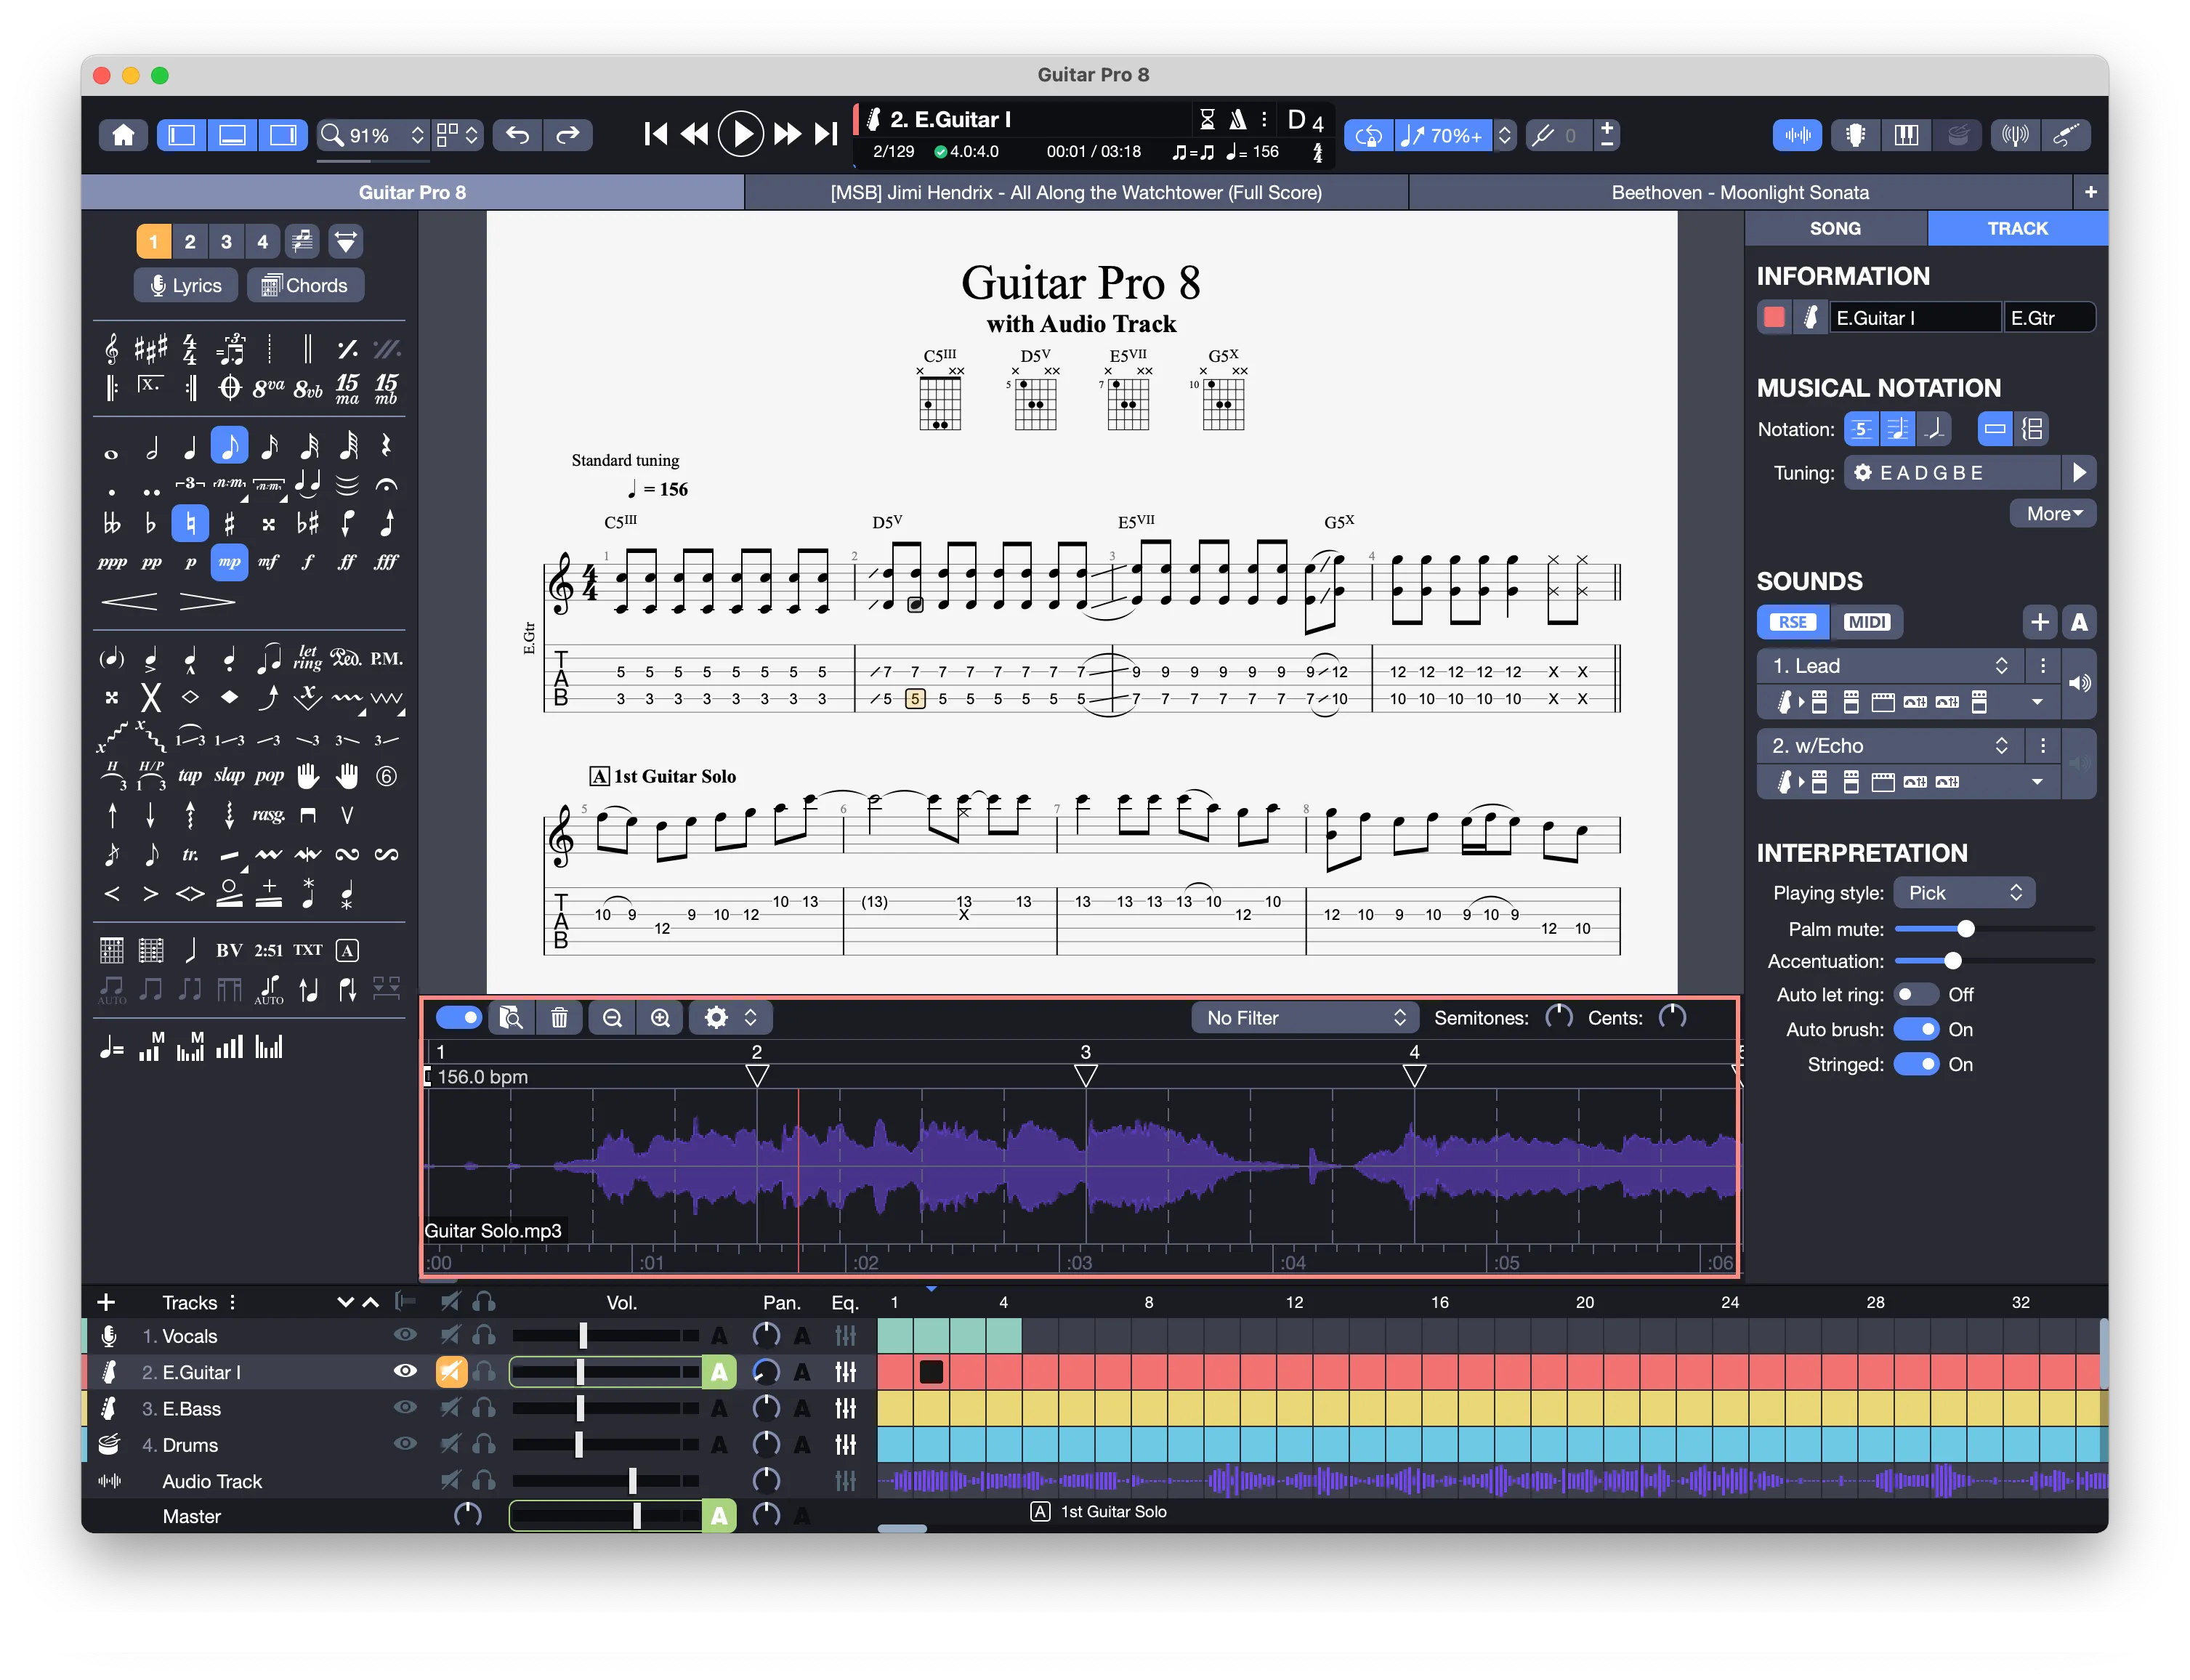
This track serves as a guide for transcribing your score step by step within Guitar Pro 8, but its uses extend further. Here are its key benefits:
- Adding a vocal track: Incorporate a real voice to create a more authentic arrangement.
- Accompaniment: Use the audio as a backing track to play along with.
- Mixing aid: Combined with the focus/unfocus feature, it helps balance your Guitar Pro mix against a reference audio file.
- Realistic playback: Blend a live recording to make playback sound more natural and human.
- Teaching tool: Add audio comments to guide users in educational files.
Overview
The audio track is a full-fledged track, displayed in the Global View for mixing alongside other tracks.

Like other tracks, its playback is affected by settings such as relative tempo, relative tonality, play in loop, count-in, focus/unfocus, master track volume and pan, and specific interpretations, including fermata or triplet feel. Structural changes, such as an anacrusis or time signature shifts, also influence it.
Since the audio track plays in an unfolded view, it ignores repeats, codas, and navigation markers, providing linear playback without cursor jumps, unlike the score.
The following settings do not affect the audio track:
- Effects (e.g., reverb, distortion)
- Volume and pan automations
- Fixed tempo
The audio track has independent controls:
- Fine-tuning in cents
- Semitone transposition
- Audio filters
- Zoom
Accessing the Audio Track
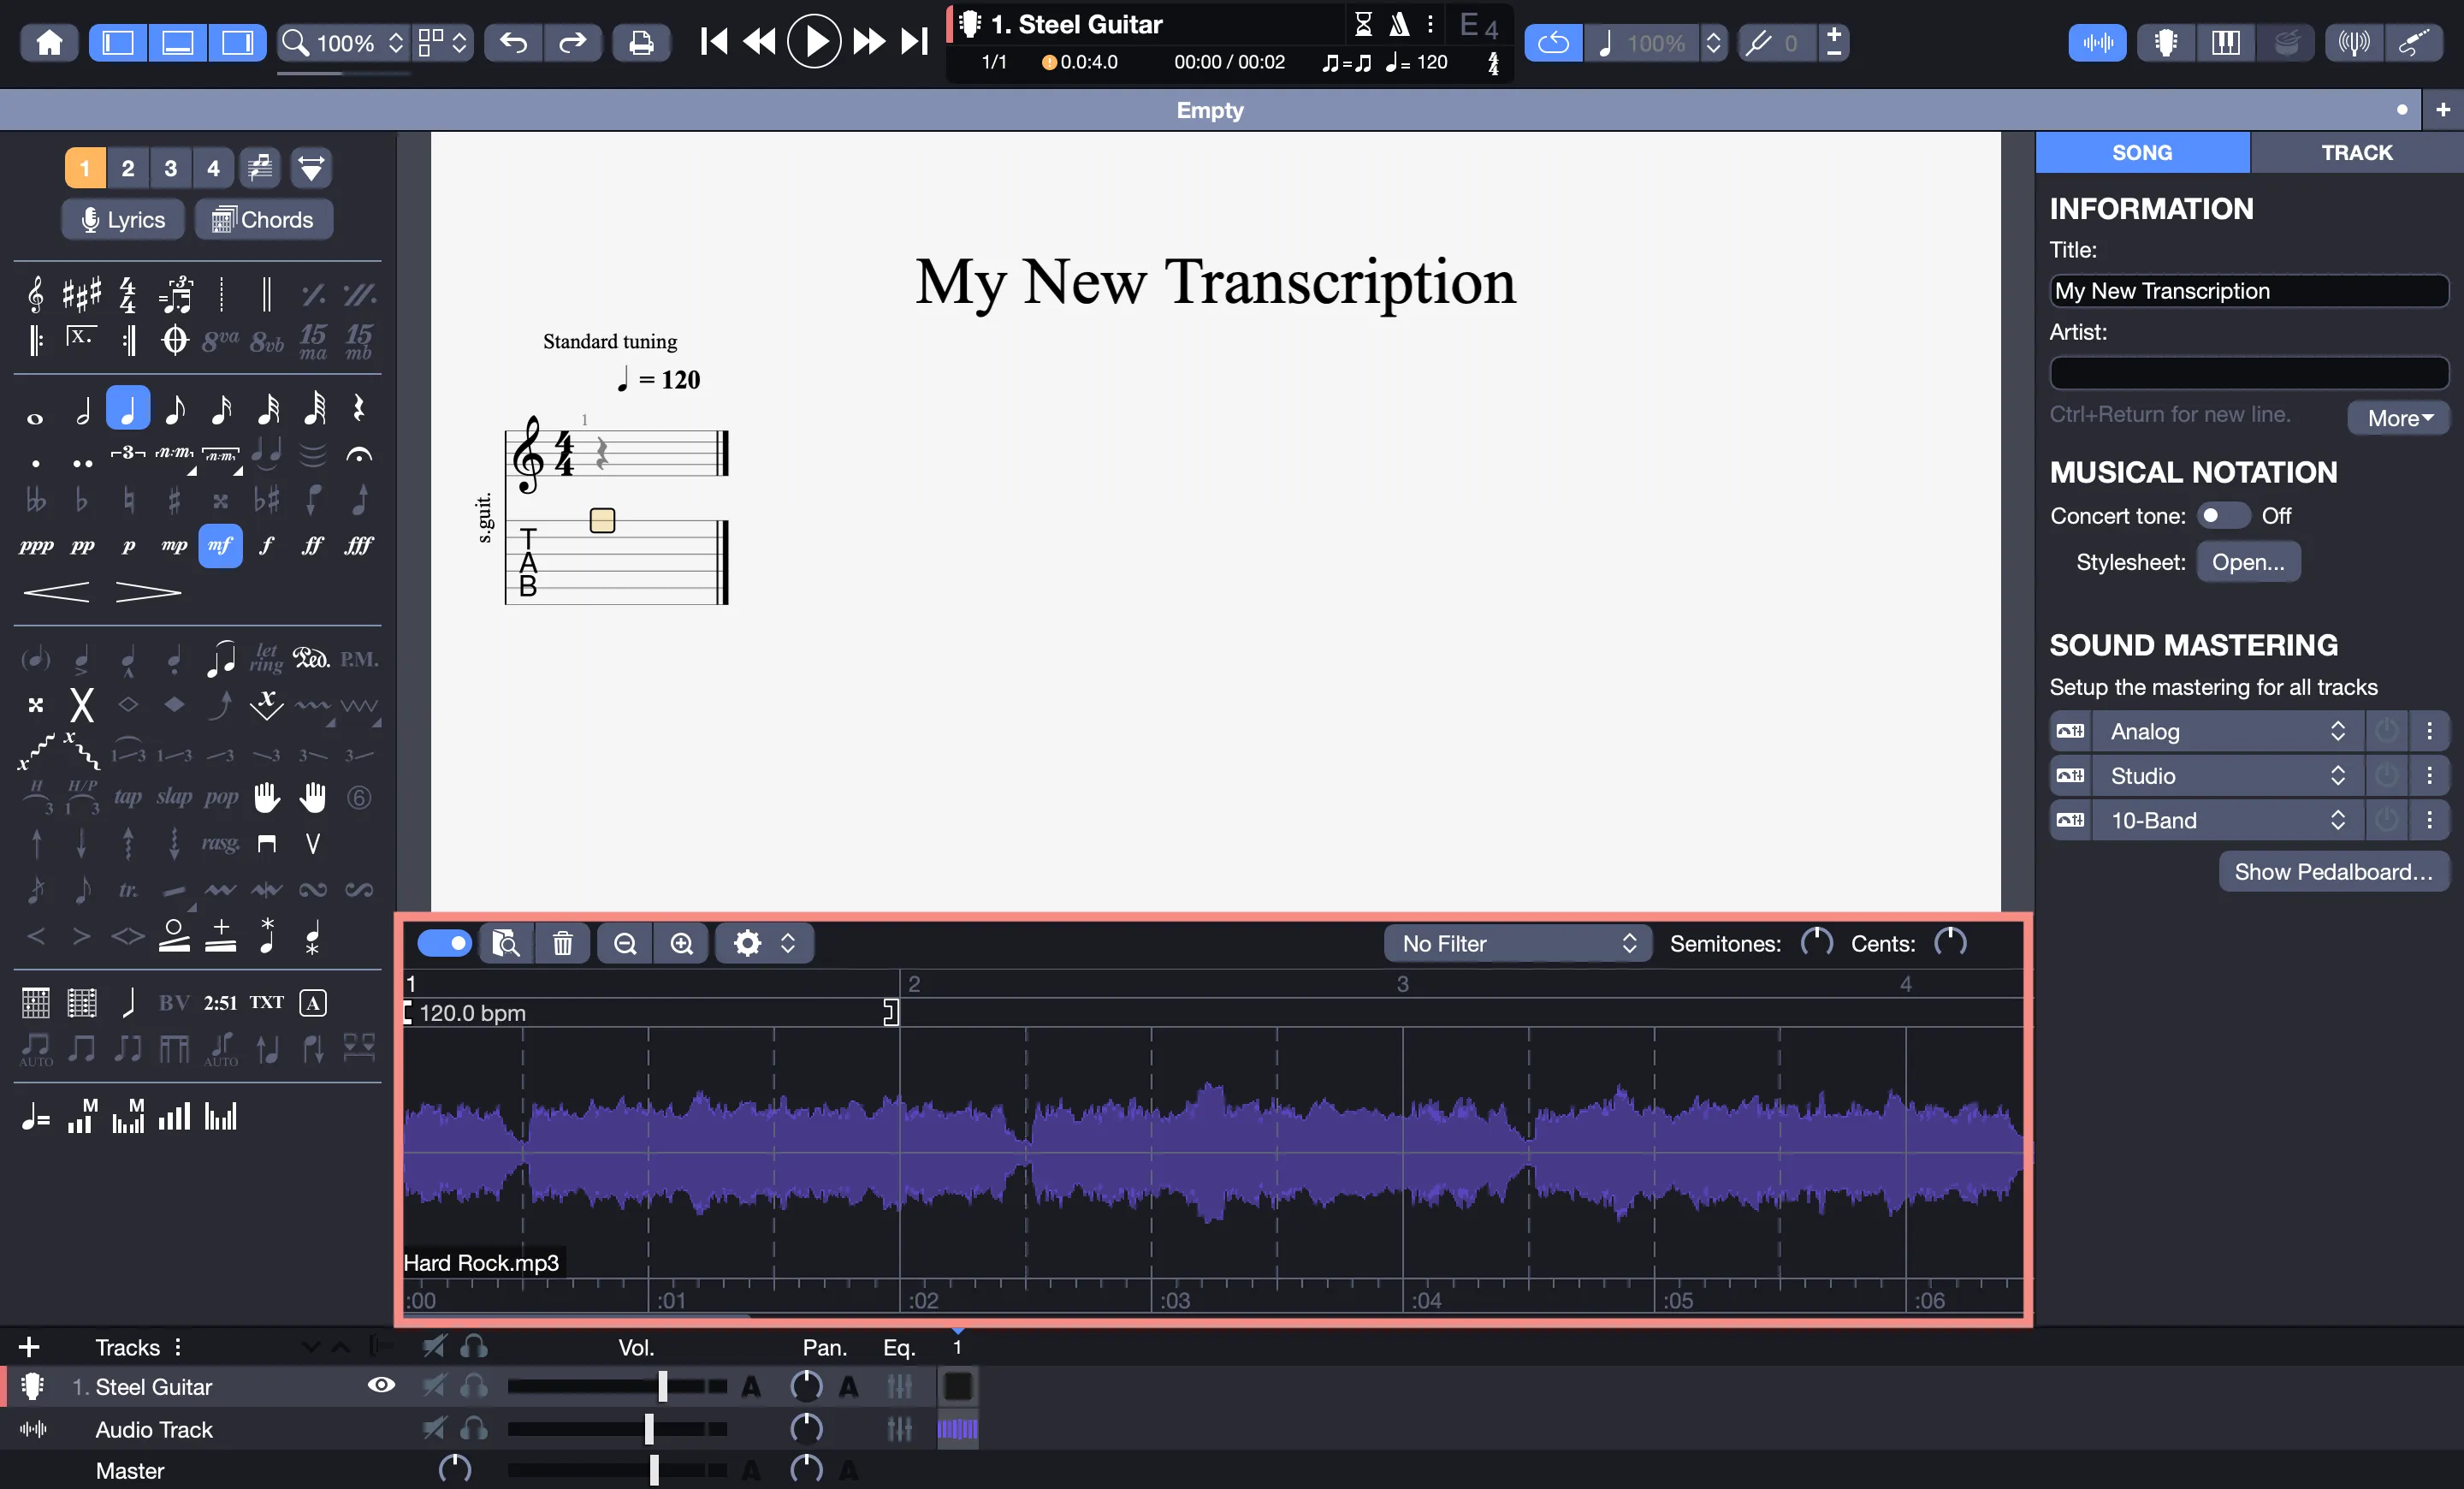
Open the audio track via View > Show Audio Track or the  toolbar button. The window appears below your score, between the workspace and the Global View.
Importing an Audio File
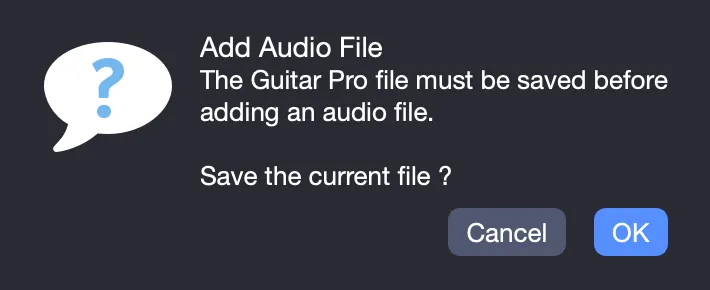
Import a file by dragging and dropping it into the audio track window, browsing your computer to select it, or using Track > Add Audio File. You will be prompted to save your current project before importing.
Once imported, the waveform appears, confirming successful loading.
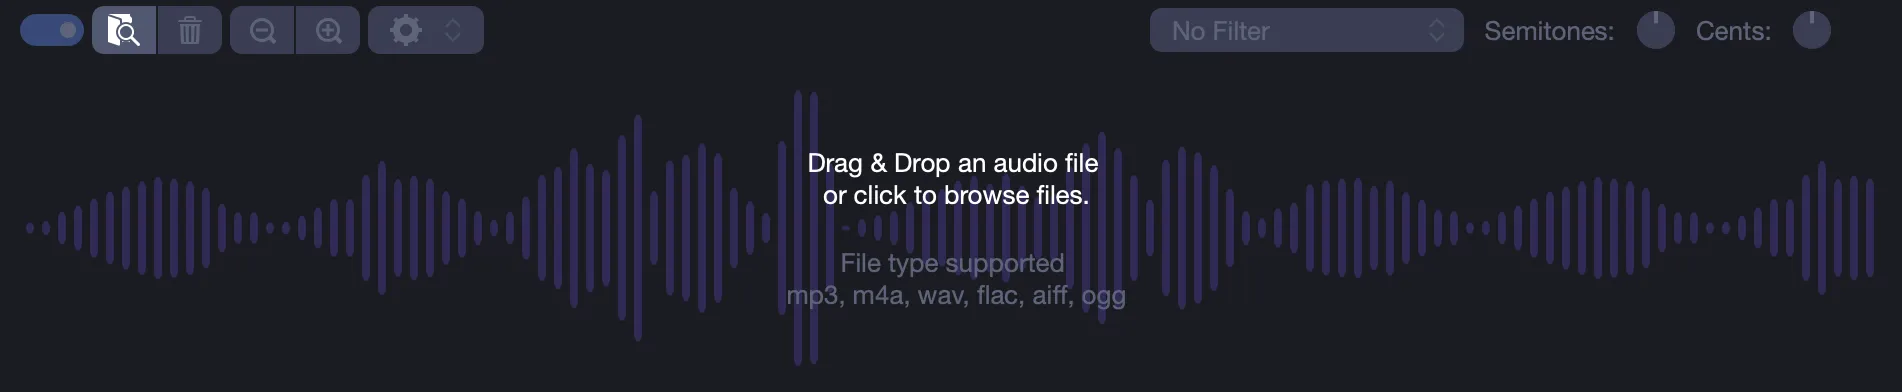
New options become available, with tooltips displayed on hover.
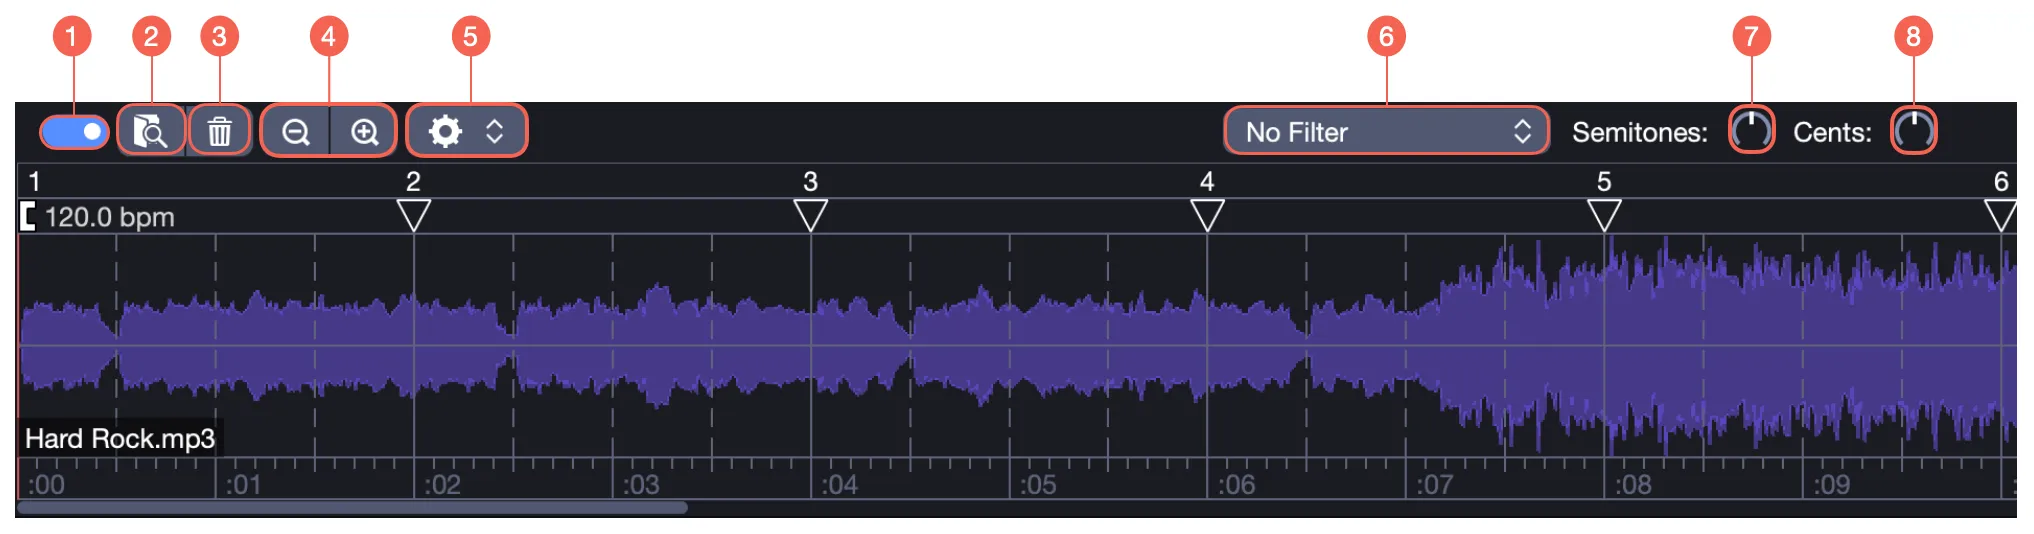
- Show/Hide audio track
- Browse
- Remove audio track
- Zoom in/out
- Perform Tasks
- Apply audio filter
- Semitone transposition
- Cent fine-tuning
The window provides key details:
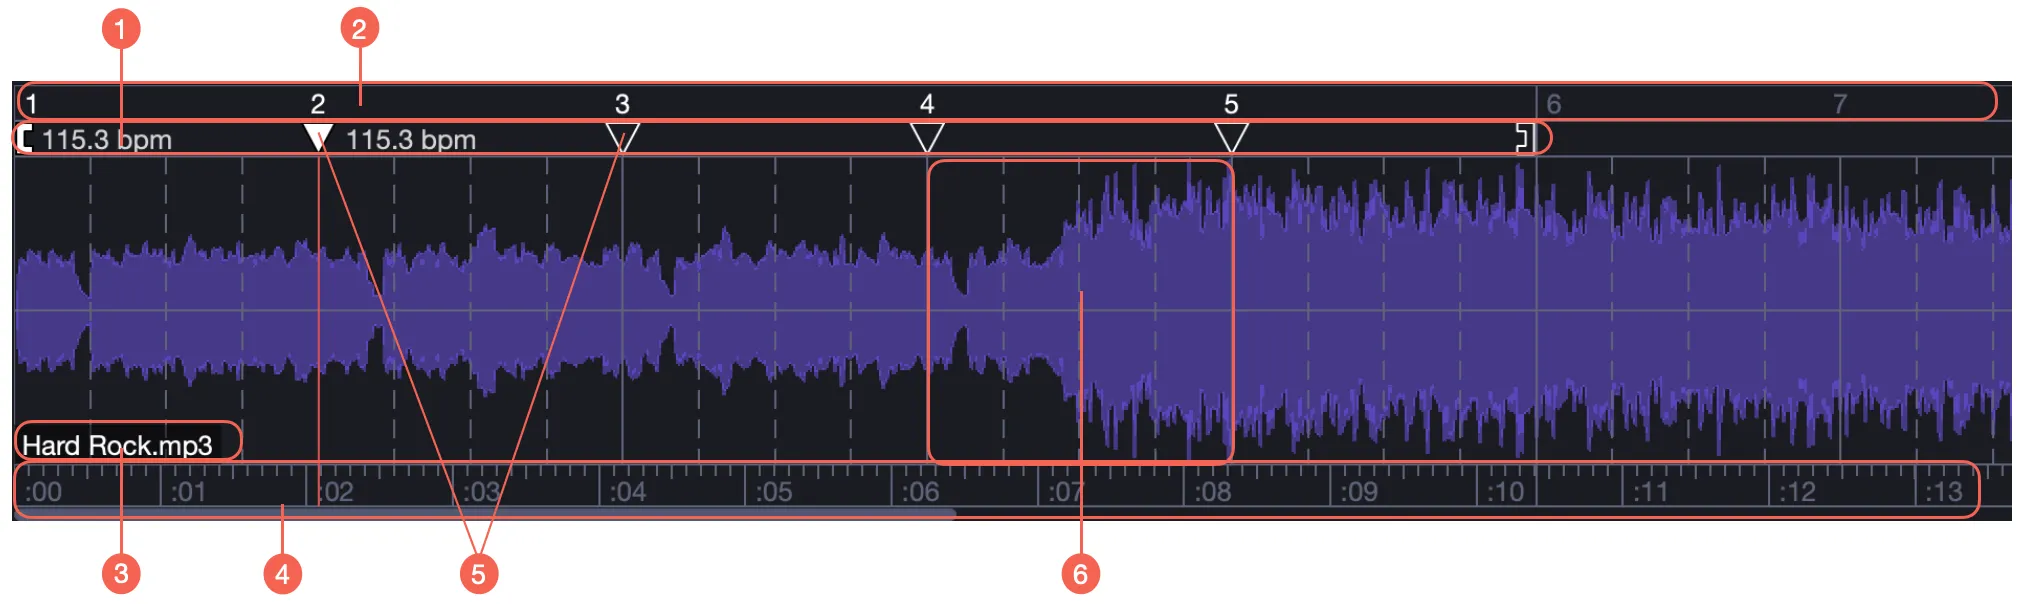
- Tempo and sync zone
- Bar markers
- Track name
- Duration ruler
- Sync points
- Single bar block
Audio Track Grid
A grid overlays the waveform, reflecting your score’s bar structure.
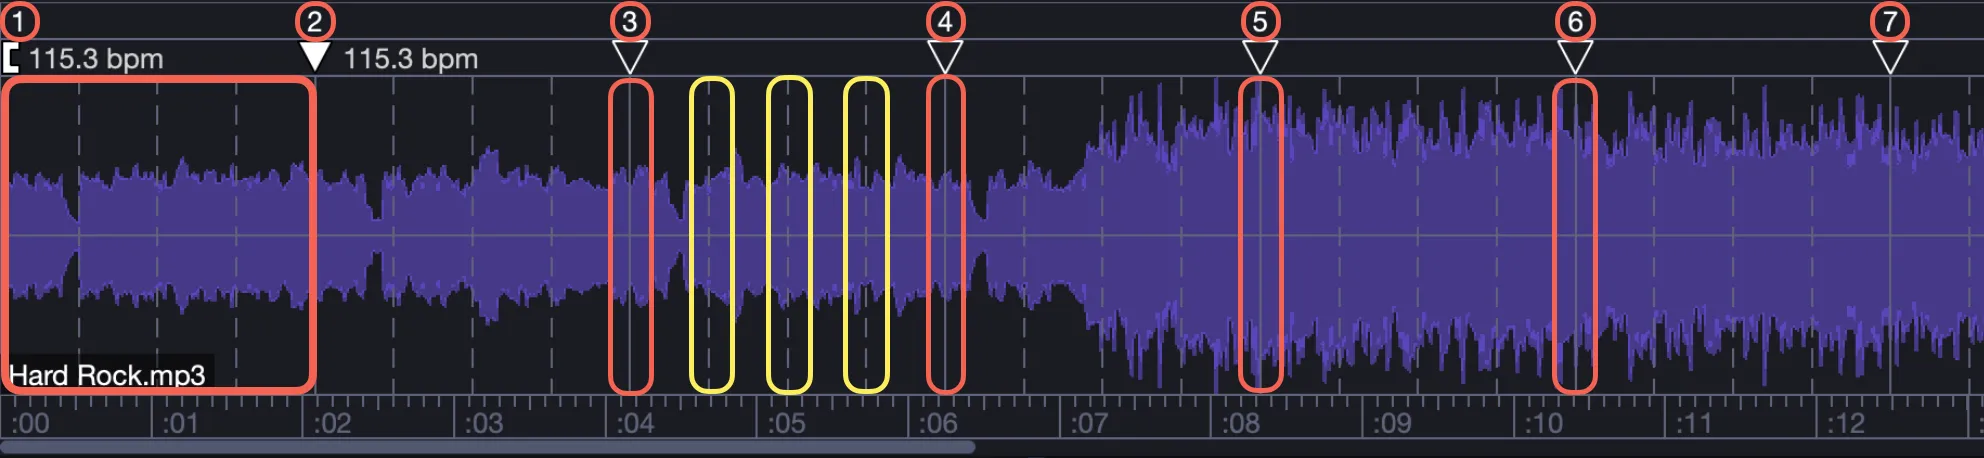
Each block represents a bar, with a solid bar (first beat, red) and dotted bars (other beats, yellow). Bar numbers appear above the first beat.
The grid adapts to the time signature. For example, a 6/8 signature shows six beats per bar:
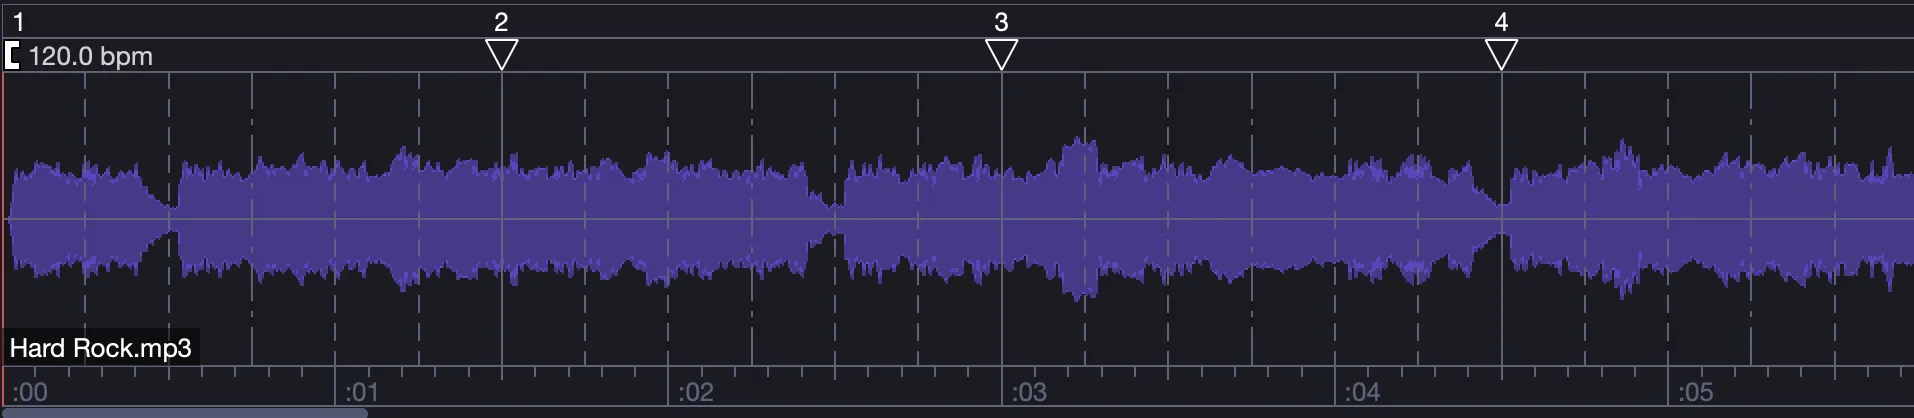
Select time bars to add sync points (detailed later). Selecting bars from the score toolbar mirrors the selection in the audio track.
Playing the Audio Track
Playback is restricted to the bars between the brackets …, defining the audio’s entry and exit points.
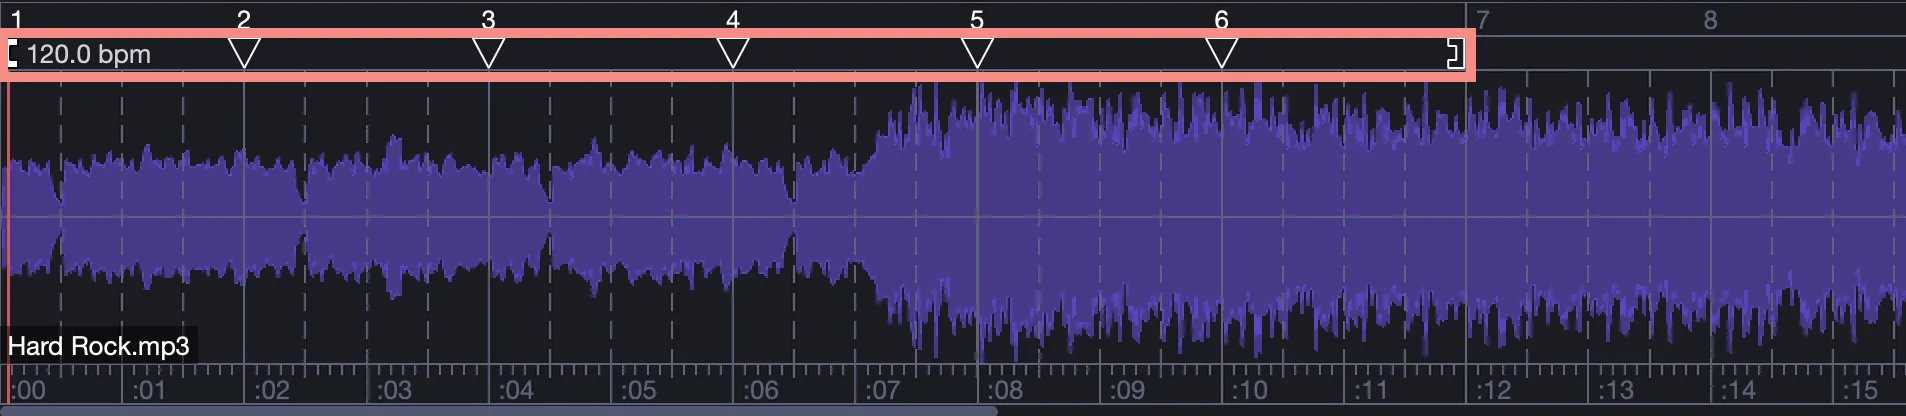
Adding bars in the score (via the workspace) extends this zone.
In a new project with one bar, playback is limited to that bar:
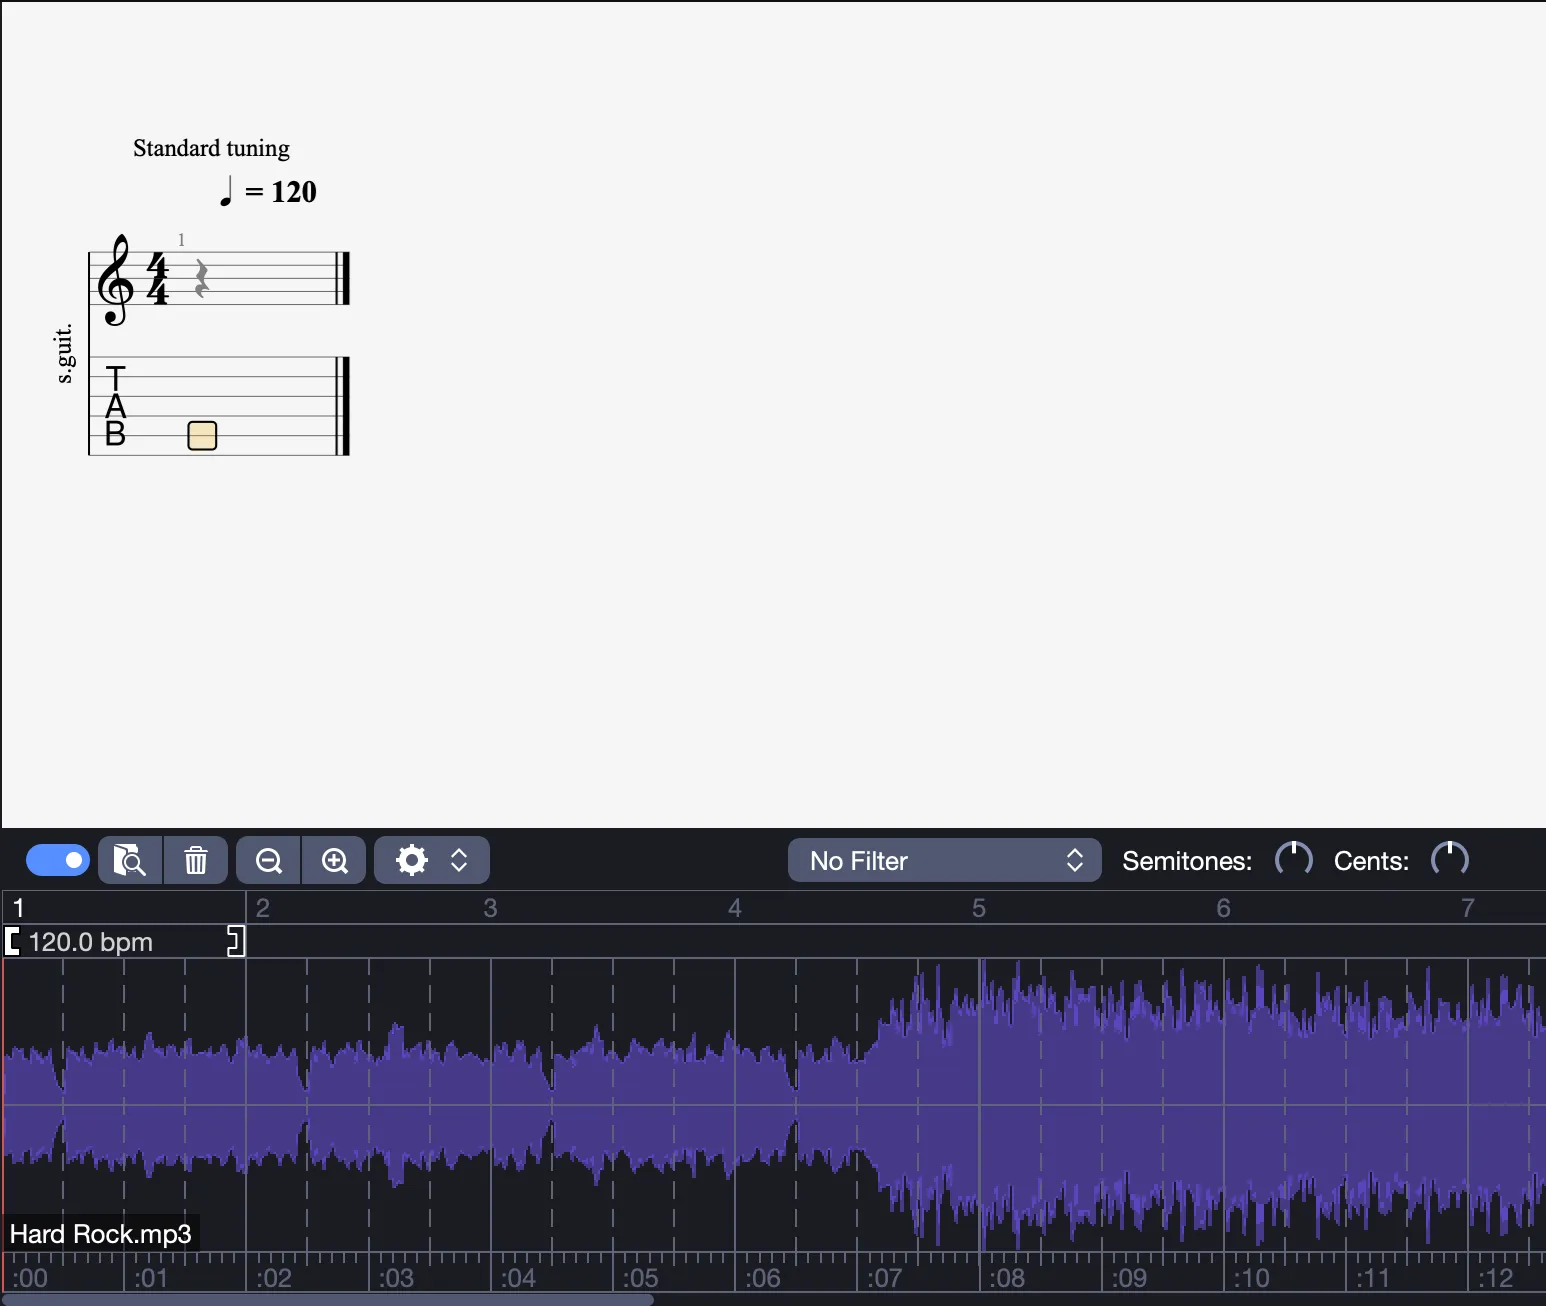
Adding three bars extends playback to four bars:
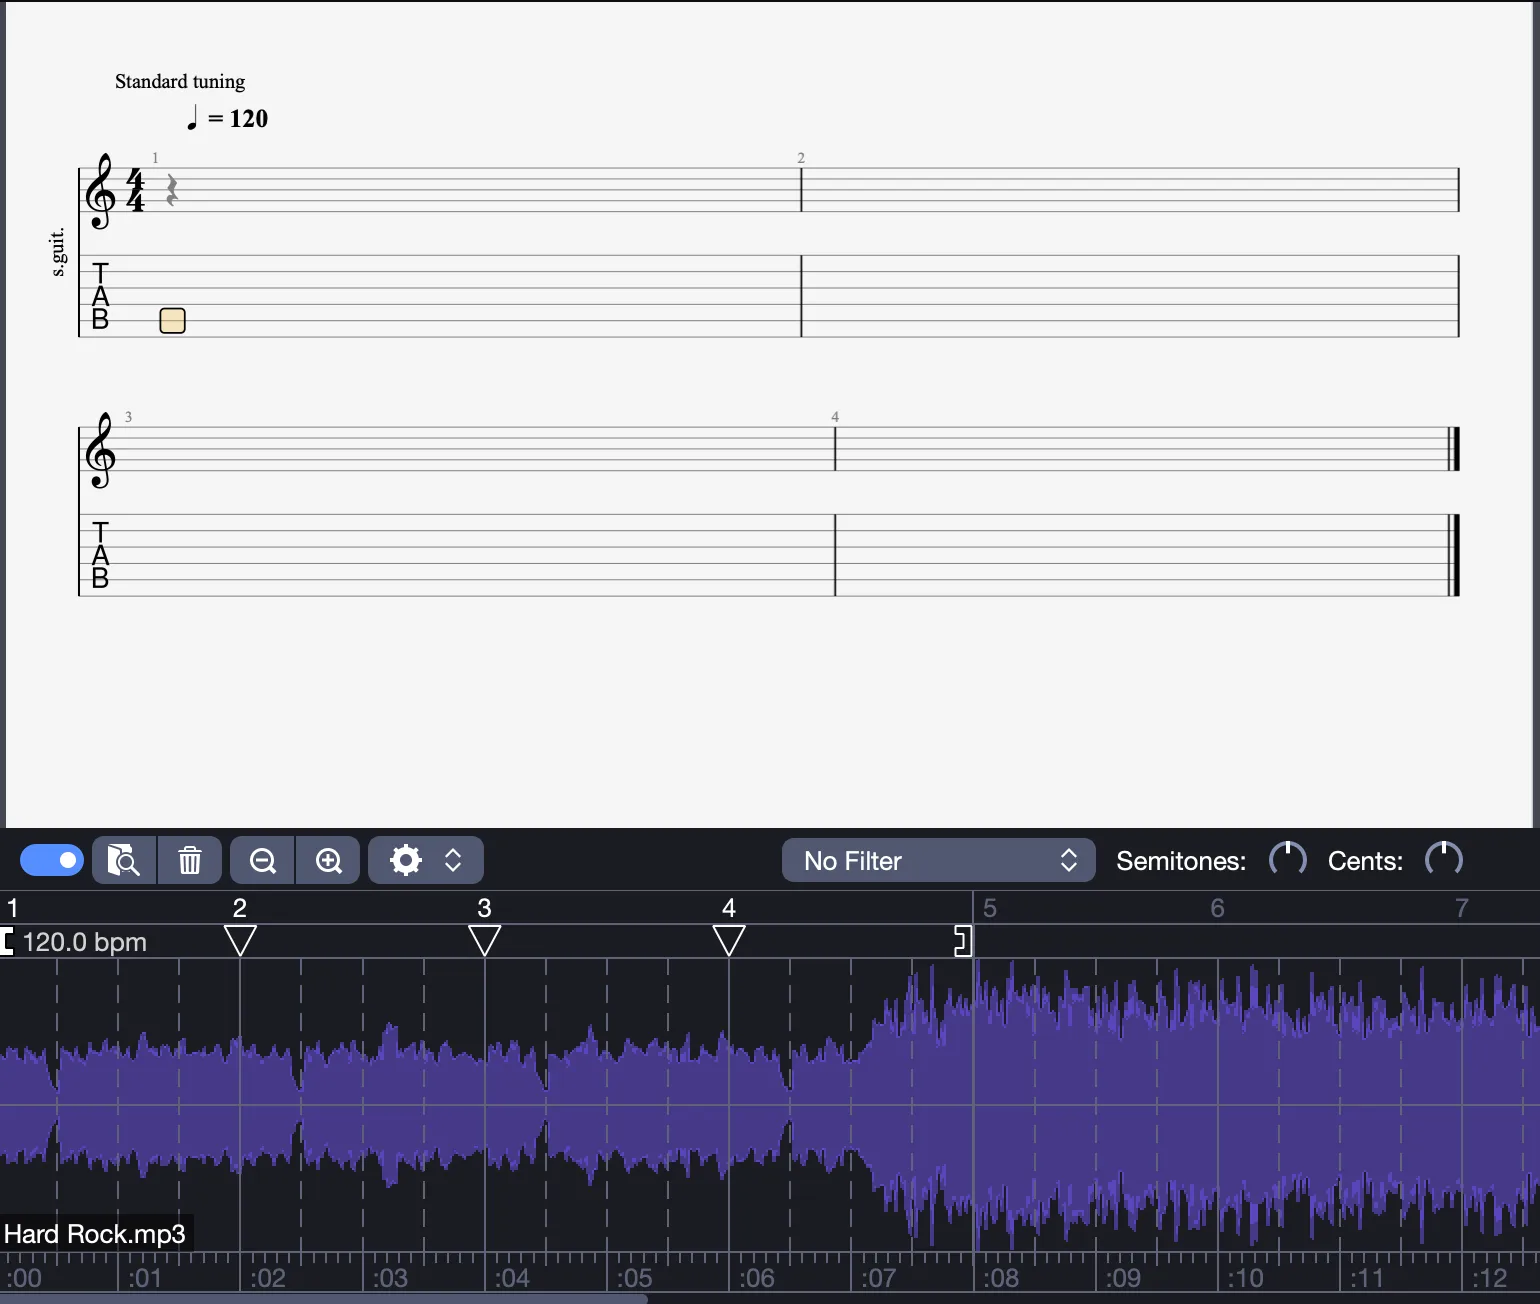
Add bars directly using the “+” icon outside the bracketed zone:
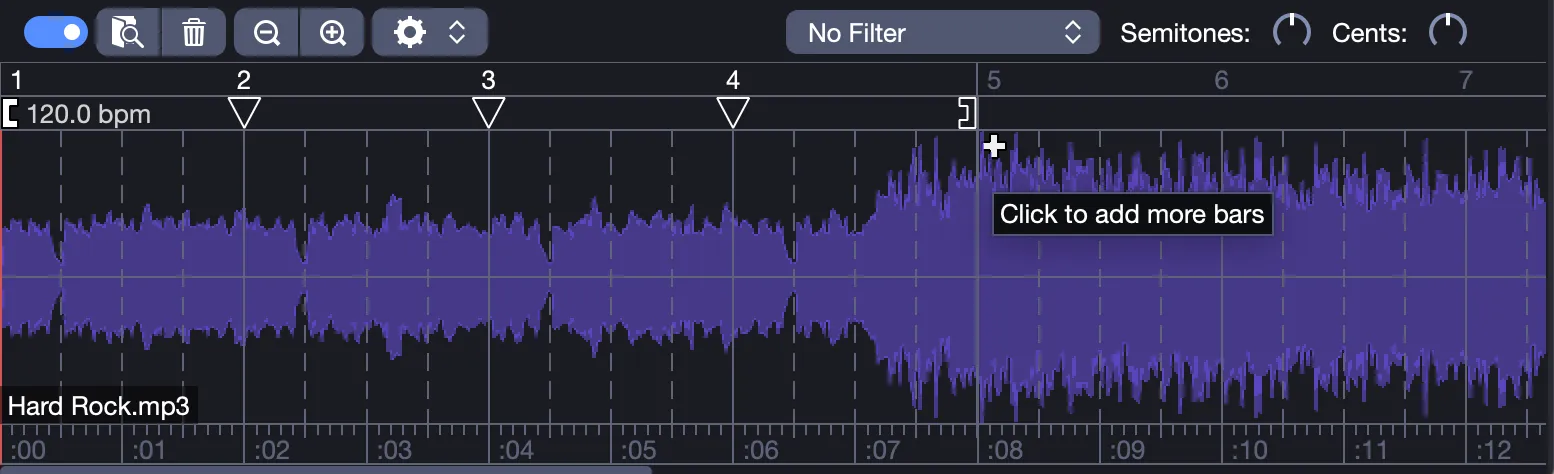
Adjust the brackets by dragging them to align the audio with the score’s actual start and end.
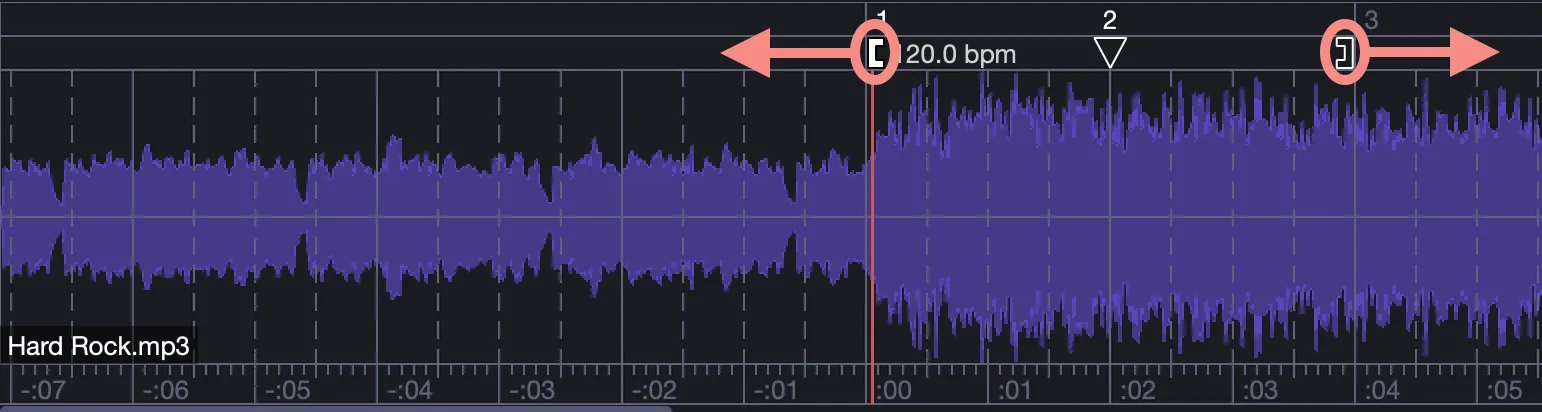
Moving brackets updates the grid, setting an initial alignment for synchronization (see Adjusting Padding and Managing Sync Points).
Start playback from any bar by hovering over the bar or section bar until a speaker icon appears, then click and hold (e.g., bar 3):
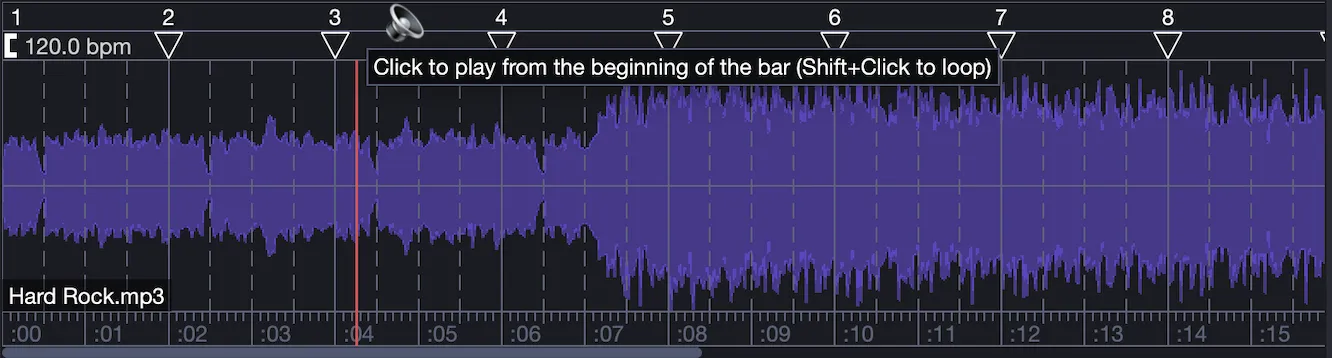
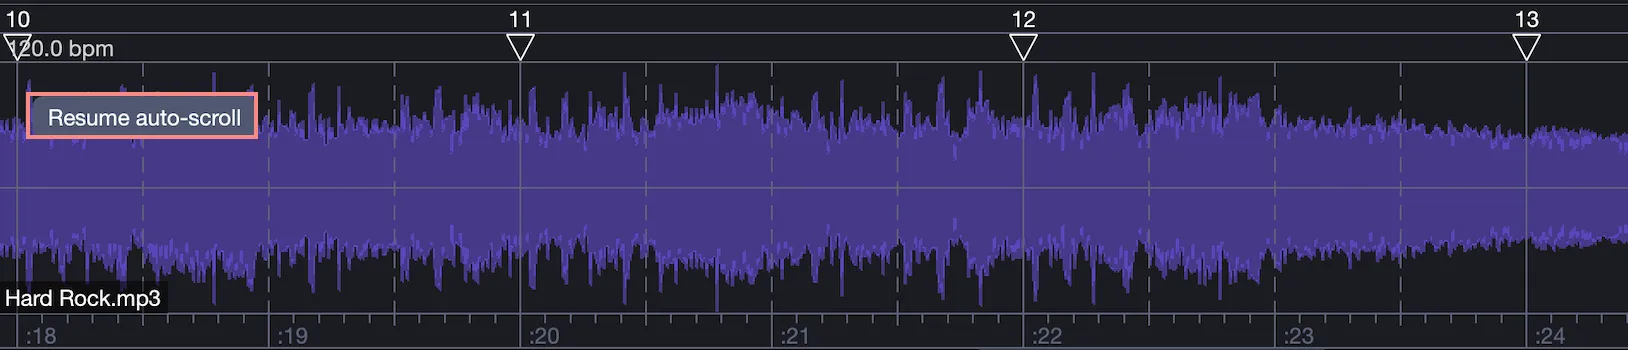
Hold Shift to loop the selection. If you lose the playback cursor, use Resume Auto-Scroll:
Adjusting Padding
Padding aligns the audio file with the score, forming the basis for synchronization. Typically, match the audio’s start to the score’s first bar, or align any corresponding moment.
Hold Ctrl (Windows) or Cmd (macOS) and drag the waveform to adjust it to the grid.

Alternatively, move the grid using the entry bracket [.
Managing Sync Points
Playback is confined to the bars between the brackets [ … ], marking the audio’s entry and exit points.
Move the entry bracket [ to set the audio’s start, or the exit bracket ] to set its end. These adjustments update the grid.
You can also adjust padding as described above.
The goal is to align the score and audio, using brackets as initial sync points.
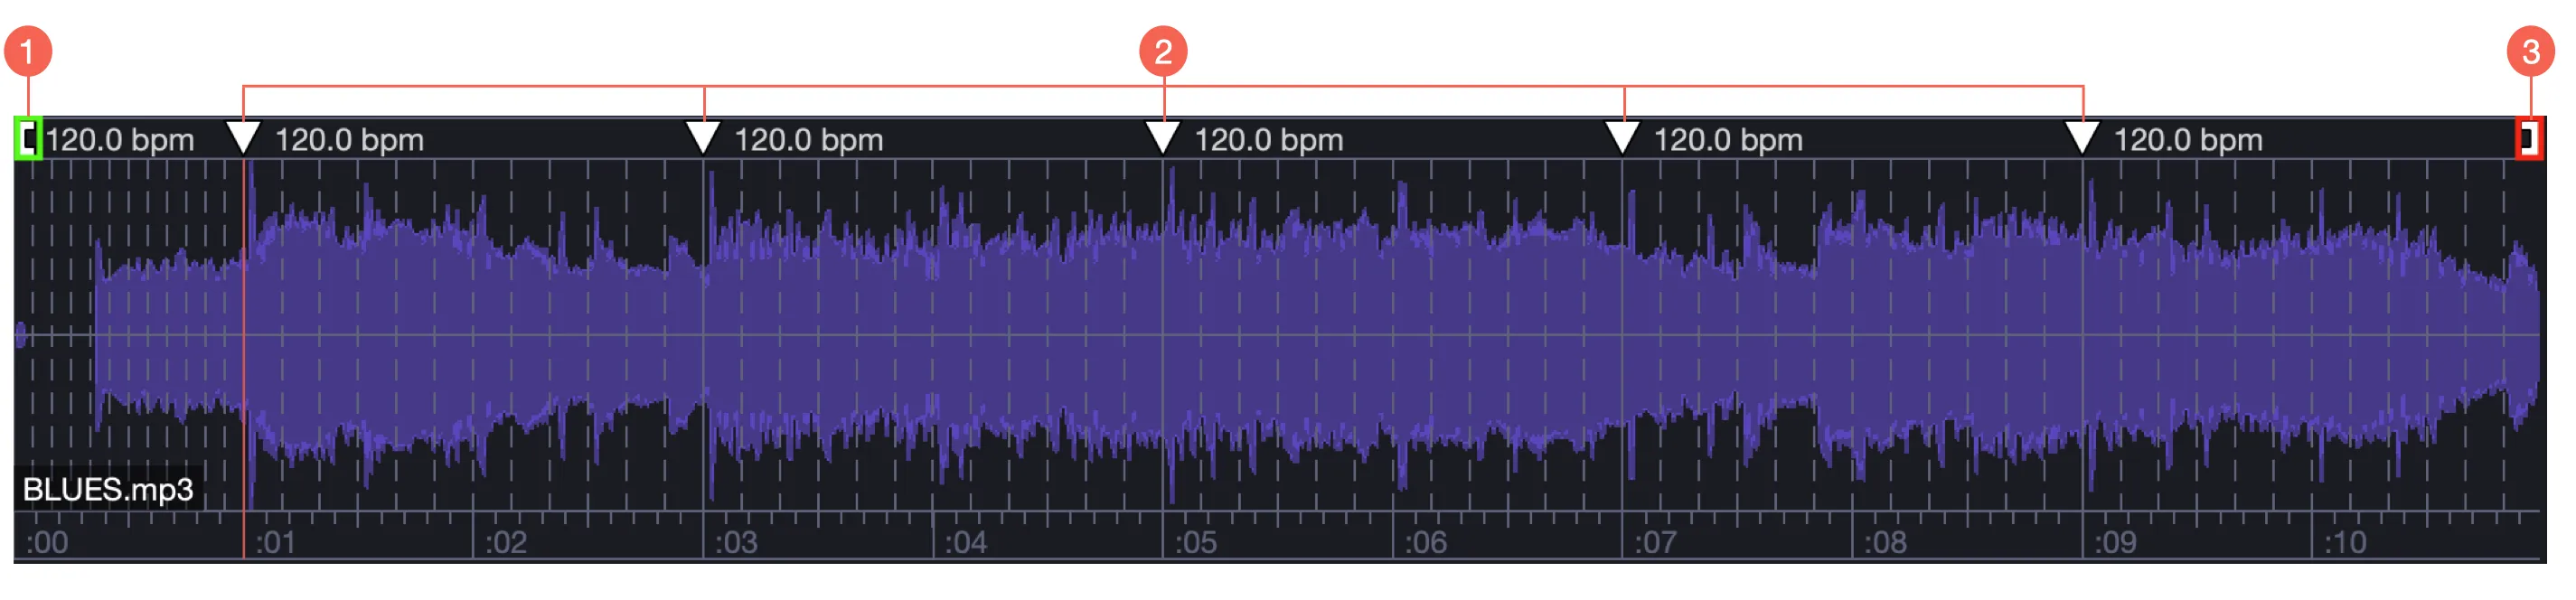
- Entry sync point
- Intermediate sync points
- Exit sync point
Within this zone, add sync points (triangles) to synchronize the score’s tempo with the audio. Default sync points are available above each bar’s first beat but remain inactive until enabled.
To add a sync point, double-click a beat in the audio track; a white triangle appears (e.g., third beat, bar 3):
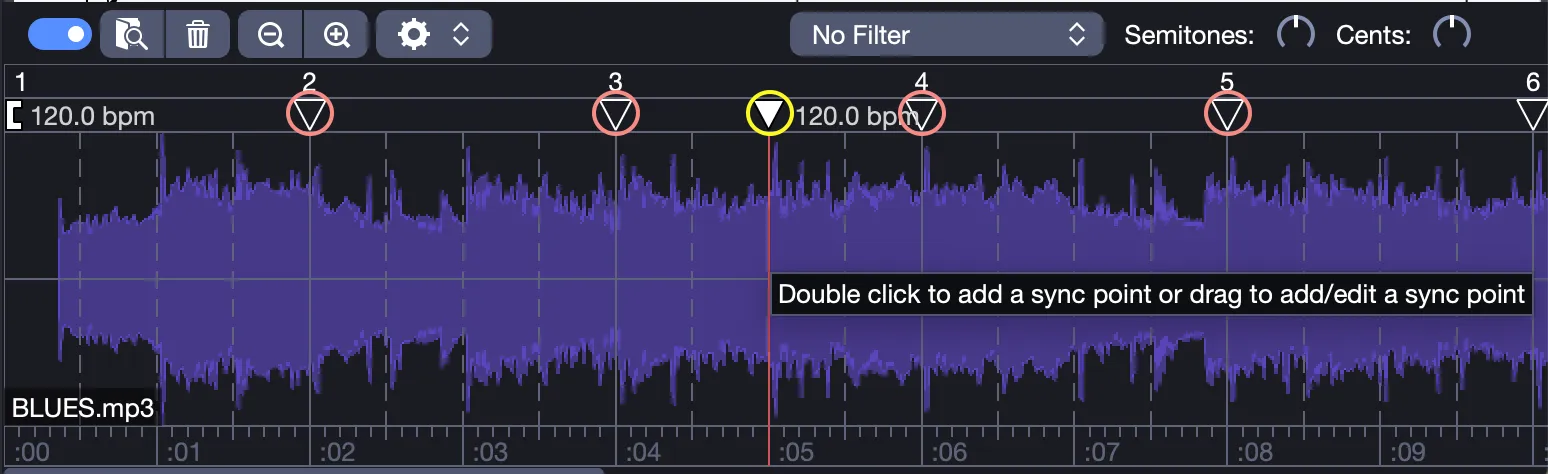
To remove, double-click again; the point disappears or turns black (inactive) for bar starts.
Move a point by selecting and dragging it left or right, adjusting the displayed tempo:
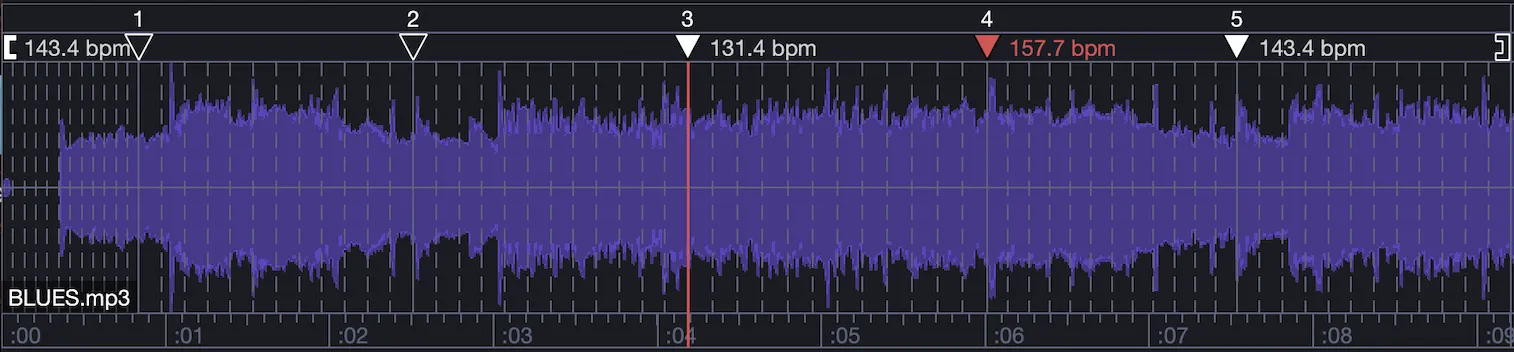
A point’s tempo applies until the next point. Removing a point reverts to the previous point’s tempo.
Clear sync points via the Perform Tasks menu or by right-clicking the waveform. Reset padding in the same menu to reposition the entry sync point to the audio’s start.
Recommended synchronization methods:
- Align the start and end brackets first, then adjust intermediate points.
- Synchronize progressively from the first bar, moving forward bar by bar.
Place your score cursor on a beat, the audio track cursor follows, double-click to add a precise sync point.
Managing Tempo Automations
Score tempo automations do not automatically apply to the audio track. Added sync points override score automations.
Import score automations into the audio track using Create Sync Points from Score Tempo Automations in the Perform Tasks menu, replacing or adding sync points.
Export audio track sync points to the score with Create Score Tempo Automations from Sync Points, accessible via Perform Tasks or a right-click on the waveform, replacing score automations.
When the audio track is active, its sync point tempos dictate playback, overriding score automations.
Audio Track Settings
The audio track appears as Audio Track in the Global View at the window’s bottom.

Adjust settings in the mixing console:
- Volume
- Pan
- Equalization
- Solo
- Mute
Six audio filters isolate or remove frequencies to highlight instruments:
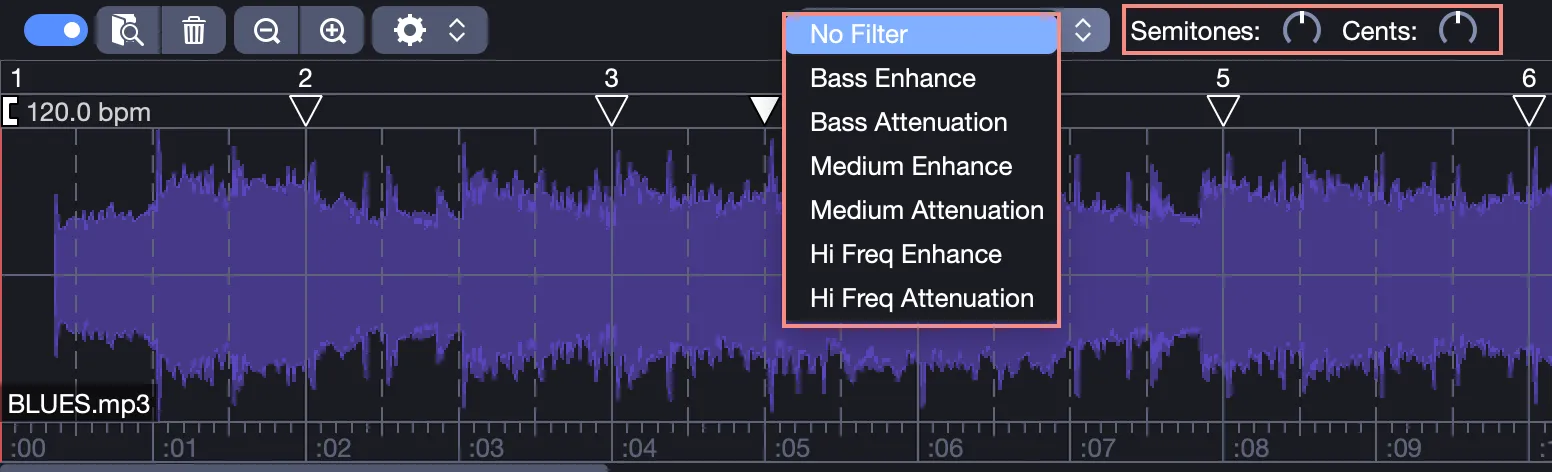
Adjust pitch in semitones or cents for precise tuning.
Exporting and Embedding Audio
Export options are available in the Perform Tasks menu:
- Embedded Audio File: Includes the audio in your Guitar Pro file, displaying the audio track window on opening. Enabled by default, uncheck to exclude it.
- Extract Audio File: Exports the audio as an MP3.
Miscellaneous
- Supported formats: MPEG, M4A, WAV, FLAC, AIFF, OGG
- Score selections sync to the audio track, but not vice versa.
- Select multiple bars using the duration ruler at the audio track’s bottom.
- Sync points are restricted to the bracketed zone.
- Zoom via trackpad/mouse, window options, or the gear icon in Perform Tasks.